HAVE QUESTIONS? ASK PHIL

Have questions about CAD, Fusion 360, or the Portland maker scene? Ask Phil! He’s a Principal Software Engineer at Autodesk, inc. and teaches CAD at Portland Community College. He’s also the host of Community Conversations series: Getting started with 3D modeling in Fusion 360

You can reach him at phil.eichmiller@autodesk.com

Phil Eichmiller — Principal Software Engineer at Autodesk, Inc.

Week 2: Summer Internship

This week I continued working on 3D asset creation. My basic approach so far has been to start with a simplified geometry from Fusion 360, then export that design as an .FBX (Autodesk Maya file format), import the FBX to Blender for UV mapping, material, and motion rigging. There’s probably a more streamline way to generate this content, but from a feasibility standpoint, this approach allows me to be flexible and to use different tools for discrete tasks. This week I will be importing these combined assets into Unreal Engine.

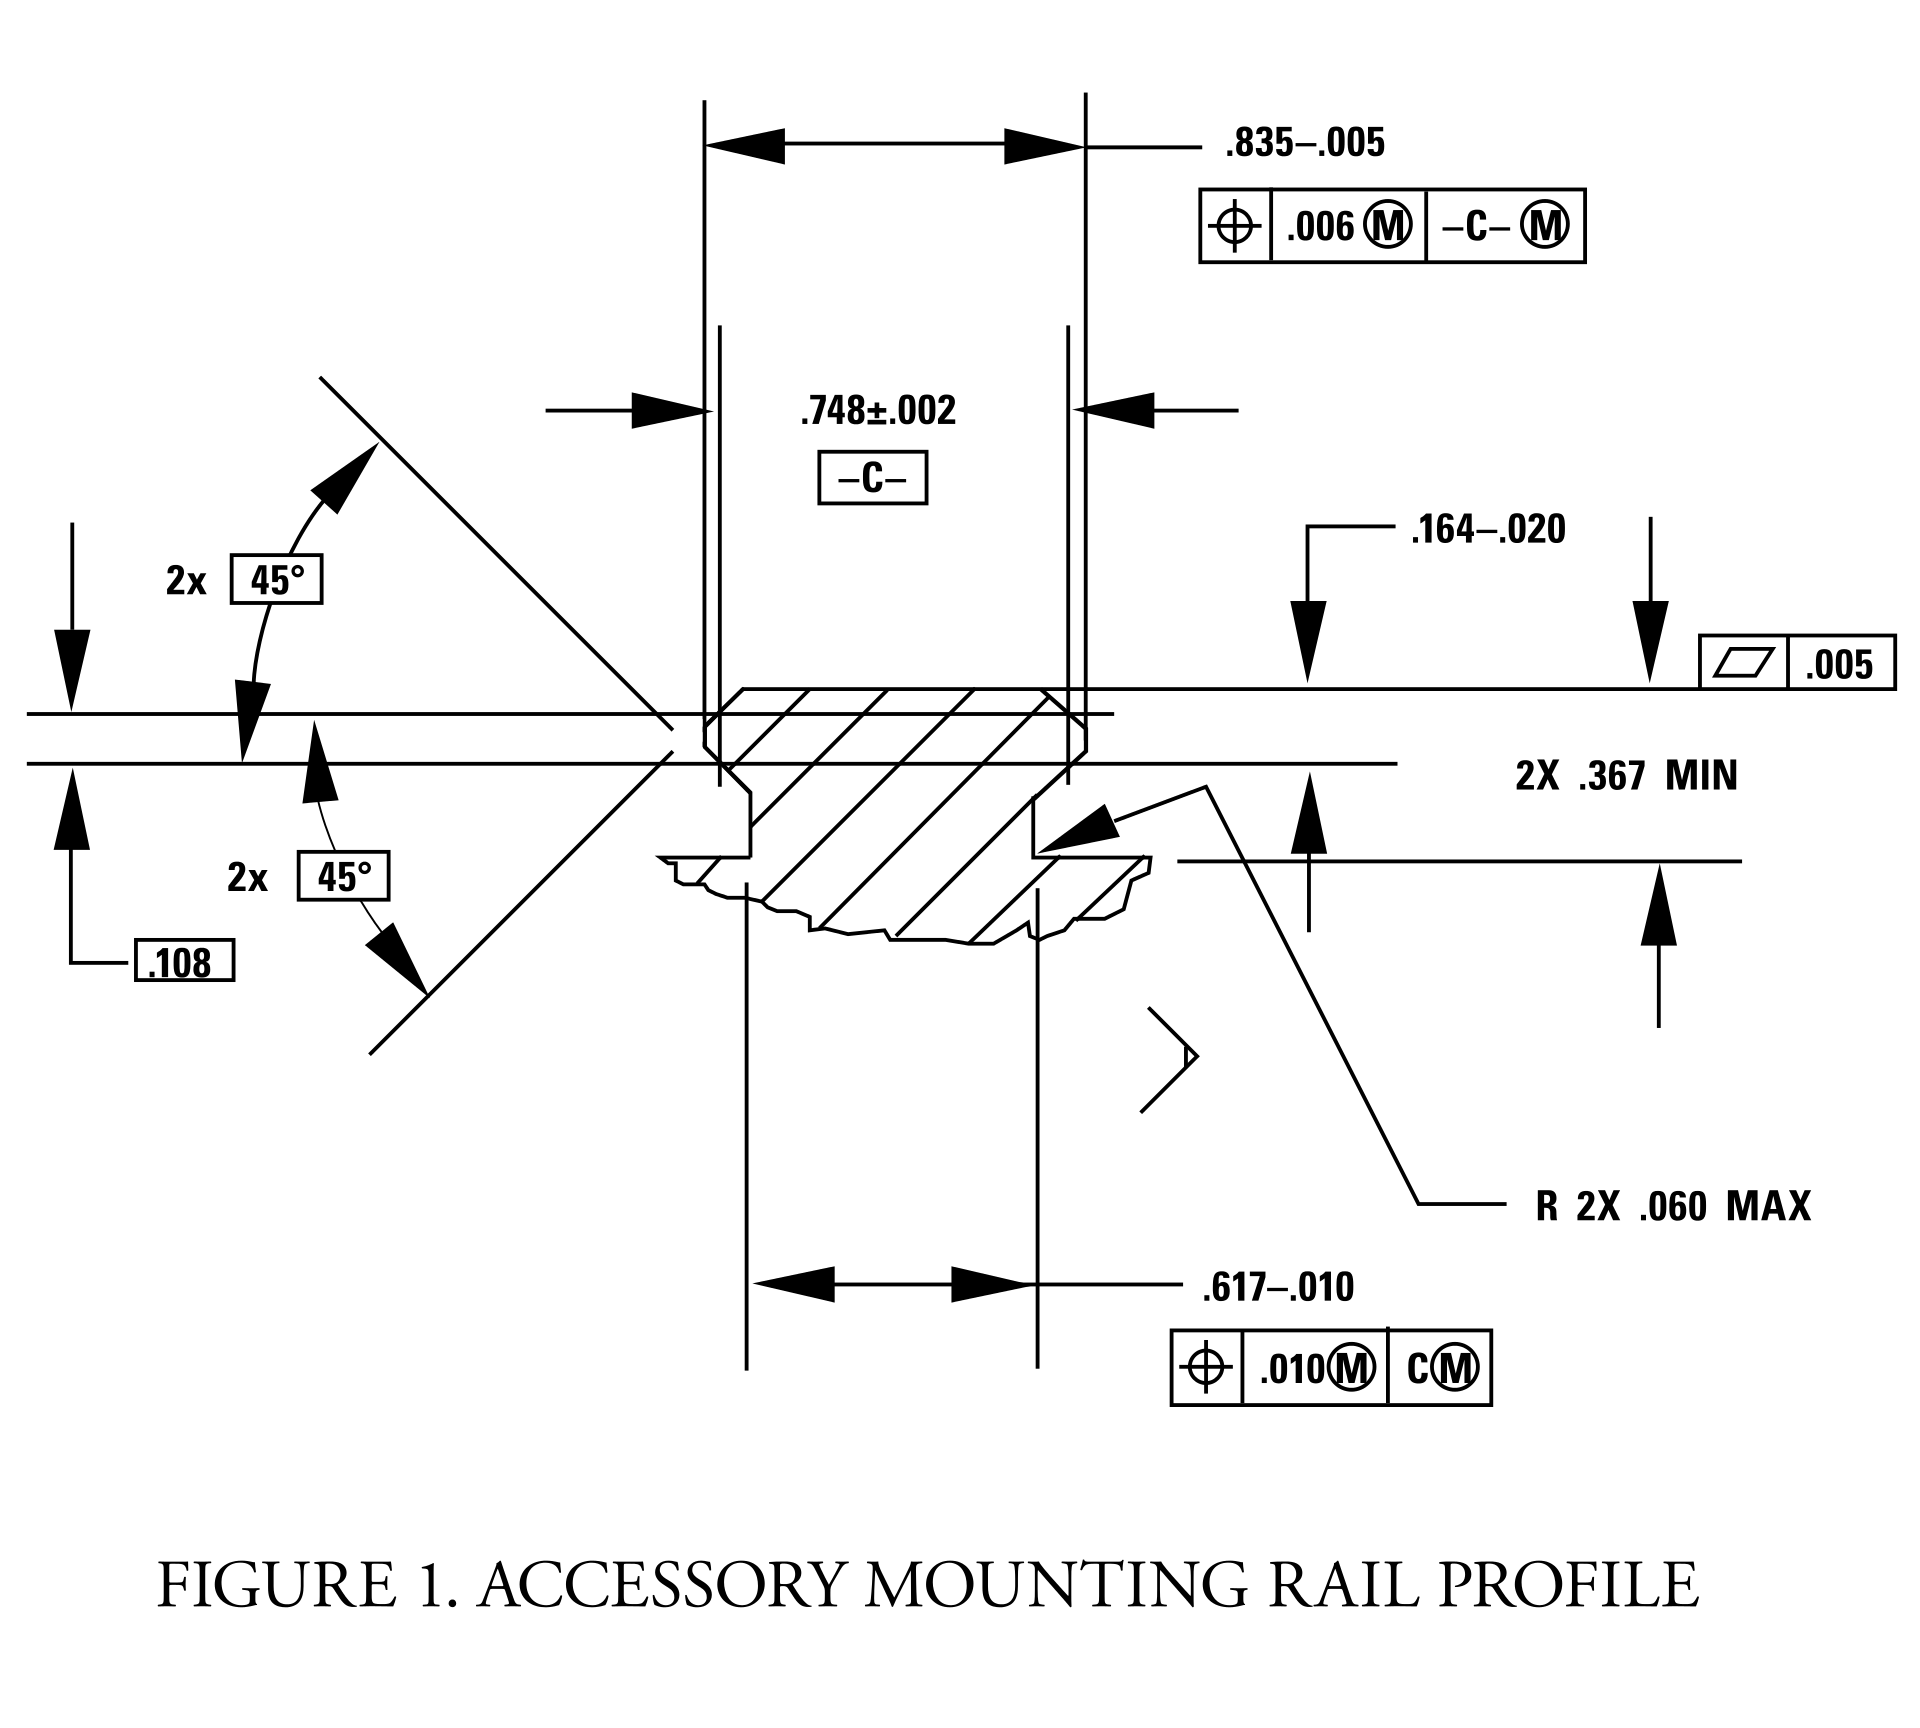
This week was also my final week for the term at PCC, where I have enrolled in their online course for Advanced Fusion 360. I’ve been working on a group project, and designing assemblies for use in a solar projector system. The design is based on COTS (commercial off-the-self parts), which required me to draft profiles to meet engineering specifications.

Picatinny rail specification downloaded from wiki-commons.

Picatinny rail specification downloaded from wiki-commons.

The final deliverables are due this coming Saturday, and there is still a good bit of work to be done before we get graded on this project. Nevertheless, I am very pleased with the current state of things. I’ve been using Quixel Mixer to produce more realistic rendering material than the library included with Fusion 360. I say, “more” realistic because Fusion 360 already has some excellent materials. Take a look at this rendering of a Bushnell 10x42 monocle (one of the components in this project):

Bushnell Legend 10x42 Ultra HD Tactical Monocular Black rendering v14.png

I haven’t yet added any details, but as you can see, the rubberized exterior and textured plastic hardware are fairly convincing. Now, take a look at the mounting hardware rendered with Quixel textures:

Picatinny rail bracket rendering v7.png

An important component in photorealism is the inclusion of flaws. Real life objects are never perfectly clean, perfectly smooth, or with perfect edges. Surface defects, dirt, scratches, and optical effects play an important role in tricking the eye into believing a rendering. With Quixel Mixer, it is possible to quickly generate customized materials. While this product is intended for use with Unreal Engine and other real-time applications, it does an amazing job when coupled with a physical based renderer.

Picatinny rail set with hardware and bracket.

Picatinny rail set with hardware and bracket.

I’m excited to see what can be done with these materials in a real-time engine, especially given the advanced features of Unreal Engine 5. Fusion 360’s rendering is CPU driven, whereas Unreal is GPU accelerated. With both Nvidia and AMD now selling GPUs with built-in raytracing support, it won’t be long before we see applications that offer simultaneous photorealism rendering within modeling workflows.

Additionally, GPUs also work extremely well as massively parallel computing units, ideal for physical simulations. This opens up all kinds of possibilities for real-time simulated stress testing and destructive testing. It wasn’t that long ago that that ASCI Red was the pinnacle of physical simulation via supercomputer. Today, comparable systems can be purchased for less than $2,000.

Of course, this price assumes you can buy the hardware retail. The current chip shortage has inflated prices more than 200% above MSRP. Fortunately, with crypto markets in decline and businesses reopening as vaccination rates exceed 50% in some regions, there are rays of hope for raytracing-capable hardware being in hand soon.

Spoonfuls of updates

This week was packed full of progress on multiple projects. I received feedback for my group’s birth control information app “MyGallery.” Our work was even featured on CMU’s Design page.

Crafting an iconographic representation for the withdrawal method was my proudest moment.

Crafting an iconographic representation for the withdrawal method was my proudest moment.

I’ve continued to explore fluid simulations with Blender. I’ve ran into some technical hurdles: Blender 2.82 uses a variety of protocols to leverage GPUs for rendering and computation. It offers an AI-driven denoiser (Optix), CUDA path tracing, and OpenCL. My MacBook Pro has an AMD Radeon Pro 5500M GPU as well as the option to plug in a Radeon Frontier Edition (first generation Vega) eGPU on Thunderbolt 3. Plenty of GPU compute power in either configuration, but there is a snag: MacOS 10.15 (Catalina) has deprecated OpenCL in favor of Metal 2+. CUDA and Optix are proprietary to nVidia GPUs. Apple hasn’t shipped a Mac with nVidia GPUs since Kepler launched (GeForce 700 series). Blender supports AMD ProRender, but I found it was terribly unstable.

I could easily slip into a tangent about how unfortunate the breakup between Apple and nVidia truly is, but I will spare you.

My current workflow involves queuing some tasks to my desktop, running Windows 10. The GPUs are dual Radeon VIIs. Unfortunately, I found that rendering on Blender is unstable when both GPUs render in parallel. No problem, since I can free up the other GPU for Folding@Home (a hobby of mine that has exploded in response to COVID-19). Who would have guessed that a global pandemic would boost a distributed computing project to exascale?

Despite these obstacles of platform compatibility, I have made significant progress on my simulation-based research. It is difficult to understate how exciting this project has been for me. For some context: the ASCI Red supercomputer (at the Sandia National Laboratories) was built in 1996, and was the fastest supercomputer in the world until 2000. It was the first computer to achieve true terascale computing (one trillion floating point operations per second). I built my first terascale computer in 2013. This was shortly after leaving my job at Intel. There was something very gratifying about building a computer with a CPU I helped manufacture. GLaDOS G4 (you can see the project here, scroll down to “Everything Else”) was built with a GeForce GTX 780 GPU and Intel Core i7 4770k overclocked to 4.5 GHz. It ran nearly silent and fit inside an up cycled Apple Power Mac G4 (microATX equivalent) case.

The ASCI Red supercomputer was designed to simulate nuclear weapons tests. Today, I am using a system roughly ten times more powerful to simulate soup spilling out of a spoon. I was inspired to approach this problem by two projects. The first was a 2013 project from Portland State University (my alma mater) to make a coffee cup for zero-gravity environments. they used drop cages and 3D printing to iterate several designs until they had a shape that held liquid. “It wasn’t needed, but it was requested.”

The other project hit me right in the heart.

The S’up Spoon is the embodiment of good design. The design was inspired by deep empathy for a user’s problem, and the solution involves as little design as possible. There are few technologies in this world that we trust enough to put in our mouths. If you can make it in this space, you can make it (almost) anywhere. During the fall semester, Moira and I visited the Carnegie Museum of Art. They had an exhibition on accessibility design, and I was brought to tears by stories of innovation and vibrant improvements to quality of life for people with disabilities. Technology, at its very best empowers people to realize their fullest potential. We can easily get lost in the exhilaration of the complex, but this impulse must not dampen our ability to appreciate the elegance of simplicity. Some problems are best solved by form. I saw many incredible solutions in that exhibition, but this spoon has really stuck with me.

My goal is not to make something better, but perhaps a little bit different. The shape of the S’up spoon is intuitive, and if we had never seen a spoon before, we might conclude that it is the better design over more traditional forms. It is however, under our current cultural context, a strange thing to behold. It looks more like a wizard’s pipe or a warrior’s horn. It is beautiful and ergonomic. I do not intend to elevate those specifications. Instead, my goal is to make a spoon that is inconspicuous while still achieving similar results for users who suffer from motor movement difficulties.

How has my first design faired under simulation?

While I can certainly see the appeal of a long hollow channel, I’ve become increasingly concerned with how this shape my be difficult to keep clean. I can imagine objects getting wedged toward the back depending on what is being consumed. I have began to work on a second iteration with a more shallow channel. Still, this first iteration does fairly well. It is managing to retain most of the 15ml (i.e., 1 tablespoon) of fluid under rapid movement.

I enjoyed this simulation so much that decided to make a rendering:

I have not yet gotten back into Cinema 4D to evaluate RealFlow. Despite the challenges regarding compatibility, I am truly impressed with how powerful this open source software has become with this latest release.

Now that I have established this workflow, I can easily switch out revised designs to test under identical conditions. I’m still not sold on the current handle shape, and I think I can improve liquid retention by tweaking the angle of the lips. The flat bottom (Chinese style spoon) does fairly well, with it’s obtuse angle walls. Next, I will try a concave structure with a wider base for the handle and a more aggressive descending angle.

Prototyping Cutlery

For one of my final projects this semester, I’m interested in creating a set of eating tools that help account for involuntary muscle movements (e.g., Parkinson's disease or tremors) and other mobility difficulties that limit the enjoyment and consumption of foods; I'm interested in exploring simple solid shapes, living hinges, and assembly forms derived from explicit advantages of additive manufacturing techniques.

[I want to make a really nifty spoon.]

Fabricating physical prototypes will be a challenge (…)

Seriously: fuck you, COVID-19.

This is not the only challenge, however. Finding access to food-safe materials, conducting a series of user tests, iterating forms, and self-directed research will also require creative workarounds to overcome the limitations of working while under “shelter-in-place” orders due to global pandemic.

I have decided to go 100% digital. instead of building various forms and testing their ability to hold fluids under rapid motion, I will instead conduct a series of simulated physics tests to evaluate forms. For the first part of this project, I am required to conduct an A/B test or evaluation. I have decided to conduct dual testing using different 3D programs.

Method 1:

Maxon Cinema 4D includes a variety of physical simulation abilities—including particles and fluid dynamics. I intend to leverage this software’s capacity to test various designs and forms. Tests will be designed to evaluate fluid retention under repeated multi-axial movements. Cutlery designs will be tested against traditional forms (e.g., standard soup spoons).

Method 2:

Blender is a free, open source platform for creating 3D models, rendering, animation, and more. Among the built-in features is a fluid simulator. Combined with rigid body and gravity physics, it should be possible to evaluate a variety of spoon shapes and (potentially) even different forms of cutlery.

Considerations:

By using two different simulations, it should be possible to more thoroughly evaluate a design’s fluid retention abilities.

Timeline:

Week 1 — Cinema 4D Workflow: Since I am already familiar with Cinema 4D, I have decided to begin this project by constructing my first simulation with this software. I will use Fusion 360 to generate original spoon designs, as well as a “traditional” spoon shape to compare performance.

Week 2 — Blender Workflow: Using the assets from week 1, I will spend week 2 developing and executing a comparable test running under Blender’s fluid simulation engine.

Resources:

Blender Tutorial - Realistic Fluid Simulation: https://www.youtube.com/watch?v=zmw-BTCbWMw

Cinema 4D Tutorial - Water simulation Animation: https://www.youtube.com/watch?v=JehbYBAZw7c

What does Day 1 look like?

Let’s just say I have a lot to learn.

Gummi Bears

I’m spread pretty thin between projects, but wanted to post some new renderings. One of the benefits of Fusion 360 is the materials customization built into their rendering pipeline. And I think this project does a good job of highlighting this feature.

I’m kicking myself for not rendering at a higher resolution, but this lighting test did a fantastic job of demonstrating refraction with a slightly rough surface.

I’m kicking myself for not rendering at a higher resolution, but this lighting test did a fantastic job of demonstrating refraction with a slightly rough surface.

While the angle and lighting are more traditional (i.e., less creative) for a rendering shot, I’m including it because of the shadows and light transmittance between materials. This is the kind of thing that only looks convincing with ray tracing. R…

While the angle and lighting are more traditional (i.e., less creative) for a rendering shot, I’m including it because of the shadows and light transmittance between materials. This is the kind of thing that only looks convincing with ray tracing. Raster engines cannot accurately simulate light passing and reflecting off of materials like this.

I have a render running in the cloud right now for a scene with roughly 250 of these gummies piled on top of one another. With so many surfaces and ray transformations and generations coming from such a complex model, I cannot render it to useable resolutions locally. You can see the rest of my renderings and download the models for yourself on GrabCad.

A Robot Took Your Job

Last week I returned from my trip to Memphis (thanks, Andy! Hope Meara’s potty training is going well!) and I’ve been playing catchup ever since. I’m getting back into Fusion 360 with some more challenging projects. This week we covered how to use joints in assemblies. This is pretty wild stuff. You can download models from GrabCAD.com and upload them Fusion 360. It auto-magically converts models to work natively (with mixed results) in the work space. From there, you can define joints and move parts in real time! We did this in class using an industrial robot model. Of course, this meant the robots needed to fight…

Four robots go in, four robots come out. Because they are metal, and very strong, and even knives won’t kill them!!

Four robots go in, four robots come out. Because they are metal, and very strong, and even knives won’t kill them!!

This wasn’t the actual assignment. Instead we needed to create a render scene involving an earlier model from this class being assembled by robots. I was grinding away at this all day yesterday, and finally got around to rendering it. Because of the complexity of the scene, it’s taking quite some time to bake in all of those rays at HD+ resolution. Here’s the object being assembled for reference:

This is based on an existing design from a vinyl shelf I bought to keep my Laserdisc collection in prime display condition. I fantasized about having an actual product made for Laserdisc, and what that might look like. You gotta with red trim right?…

This is based on an existing design from a vinyl shelf I bought to keep my Laserdisc collection in prime display condition. I fantasized about having an actual product made for Laserdisc, and what that might look like. You gotta with red trim right? Because LASERS!!

Here’s a technical drawing, if you want to build your own. This will probably hold about 250 titles, based on my experience with my current shelf ( tweaked the dimensions to give it a bit more depth and room to breathe between stacks.

Here’s a technical drawing, if you want to build your own. This will probably hold about 250 titles, based on my experience with my current shelf ( tweaked the dimensions to give it a bit more depth and room to breathe between stacks.

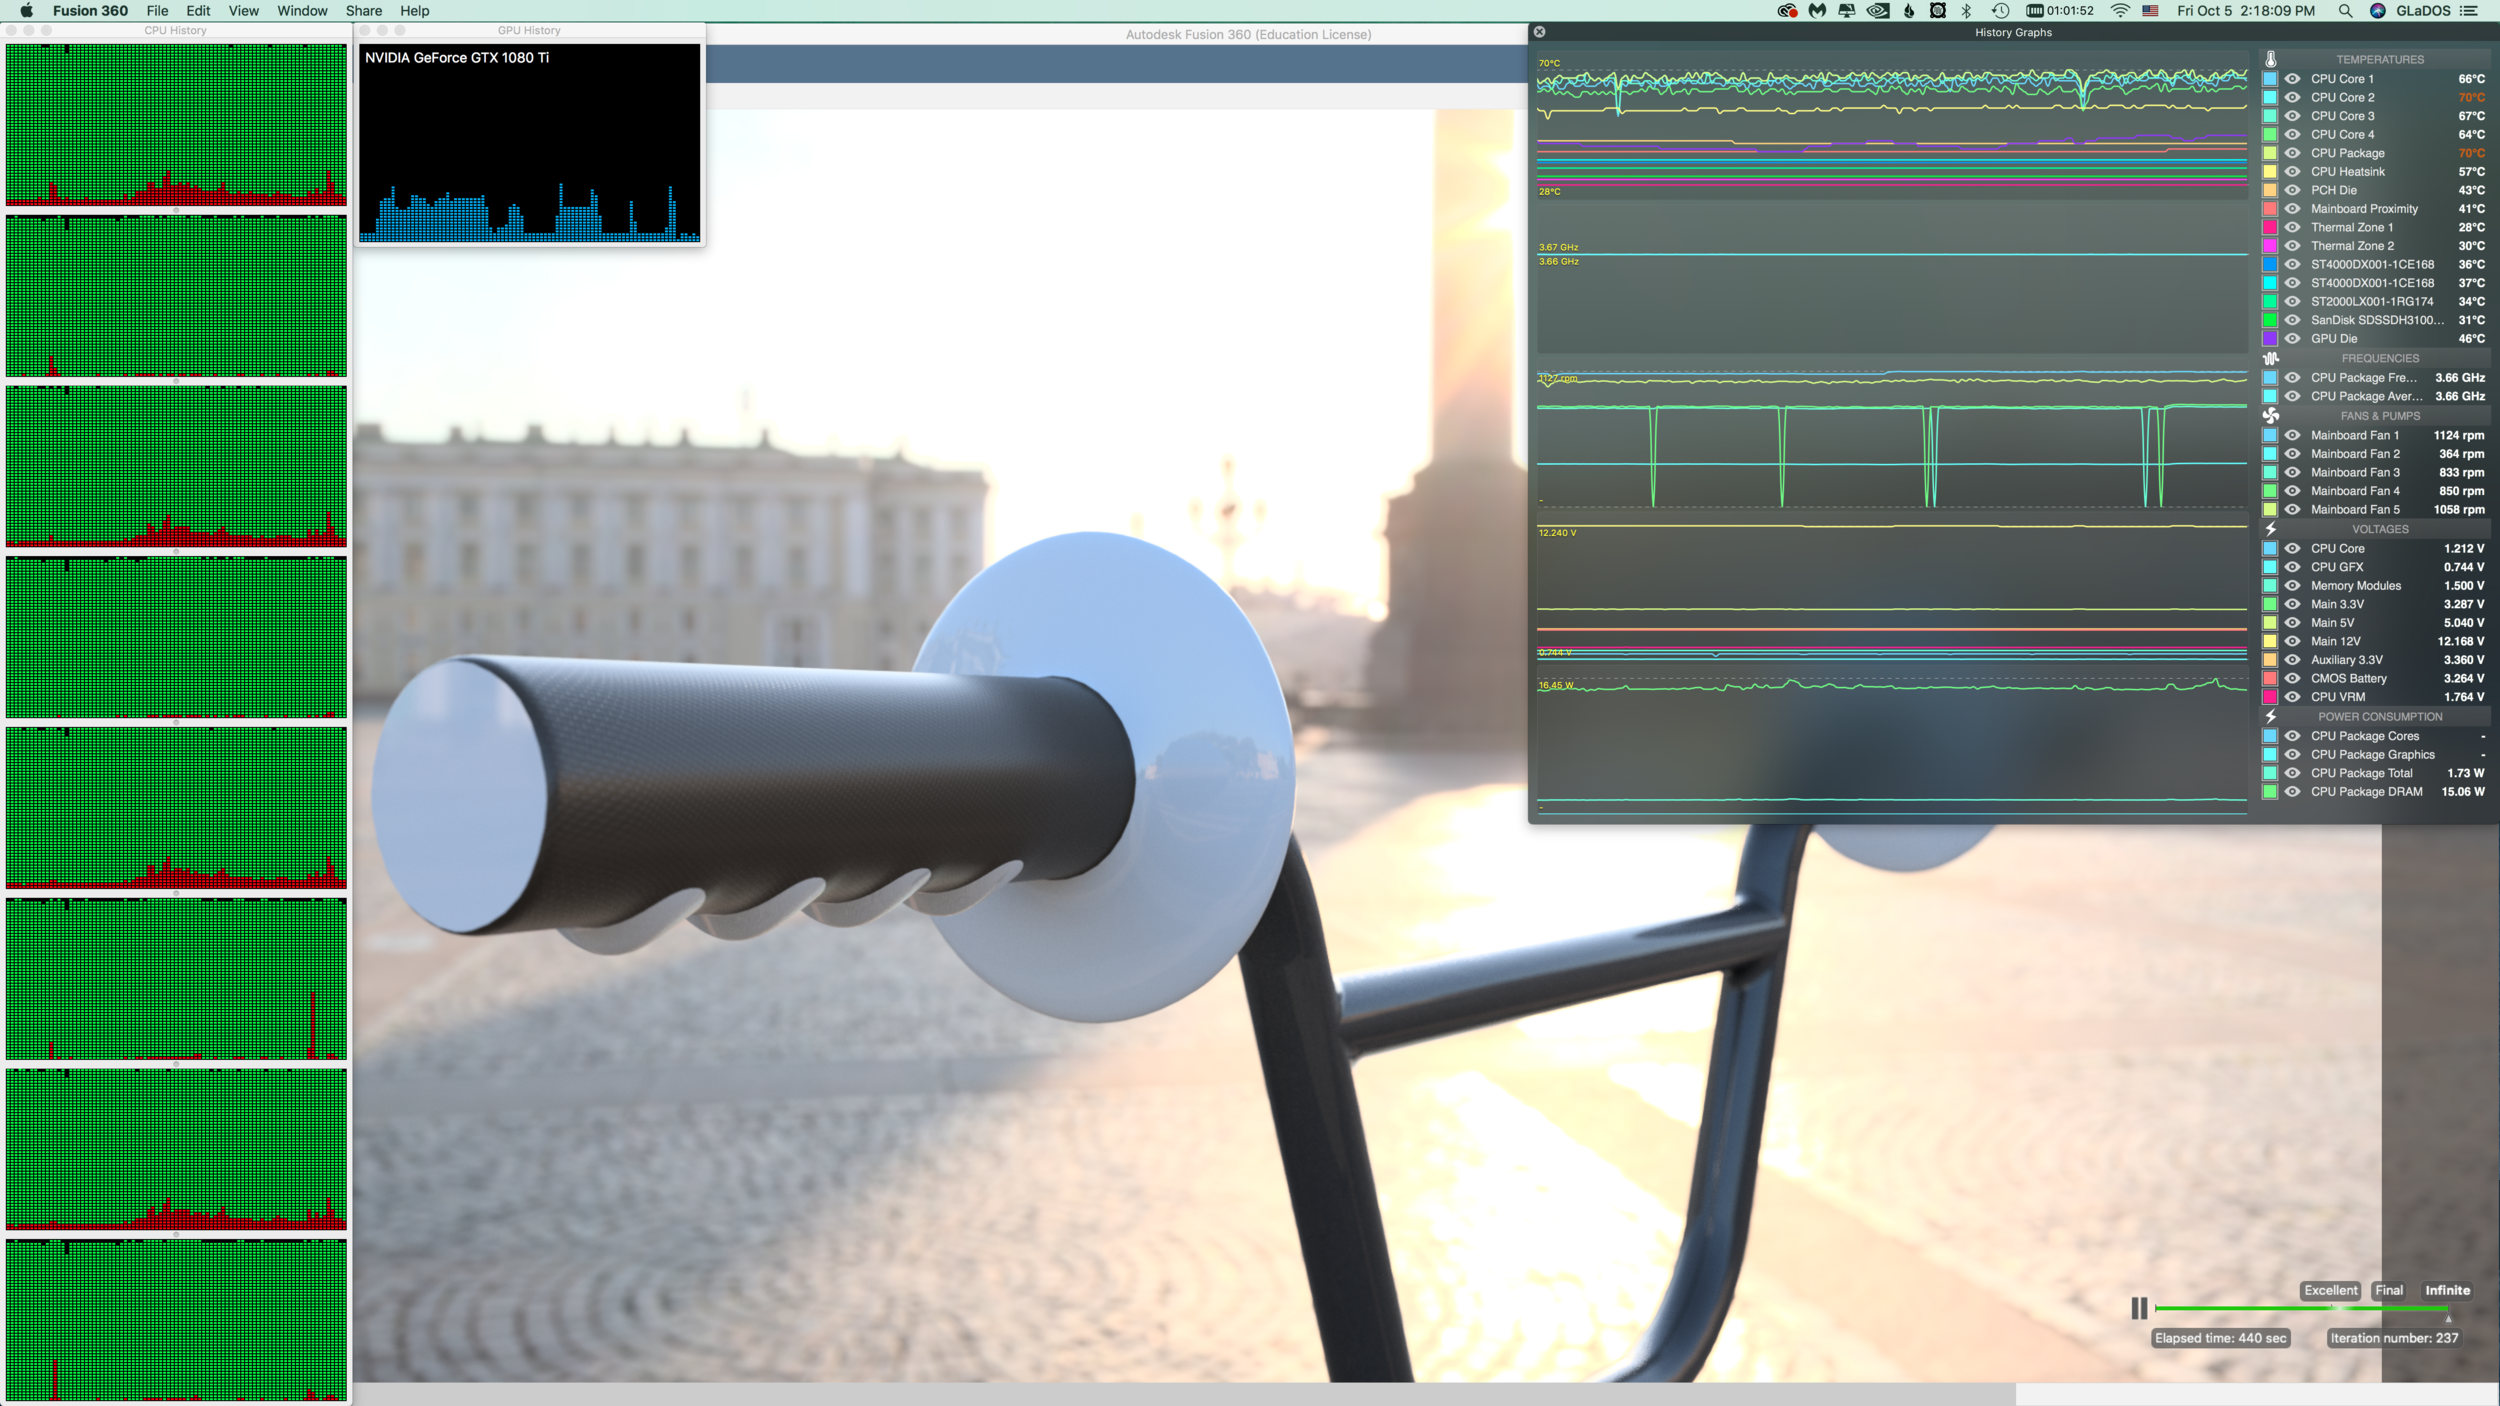
i’ve been taking this class as an opportunity to not only learn the software, but also to push the limits of what the software can do. For me, this practice is like cartography. I’m mapping the borders by extending to the edge in all things. With this project, I wanted to not only torture test the rendering pipeline, but also test the limits of my beefy Hackintosh. As noted previously, my CPU appears to be the main bottleneck. But I wanted to see what it takes to exceed memory requirements. For this design and ray tracing session I’m utilizing ~25 GB of memory, and cooking my poor little quad-core Haswell® chip.

Nothing cooks like CAD! Note that the temperatures reflect a system with AIO liquid cooled CPU, and nine total fans, packed into an old PowerMac G4 case. Even when protein folding on both GPU and CPU, the system usually has a CPU core temperature ce…

Nothing cooks like CAD! Note that the temperatures reflect a system with AIO liquid cooled CPU, and nine total fans, packed into an old PowerMac G4 case. Even when protein folding on both GPU and CPU, the system usually has a CPU core temperature ceiling of about 70˚ C.

It’s been over four hours as of writing this, and the rendering has not yet reached “final” quality. Scene complexity is a huge factor in rendering time.

Autodesk Fusion 360

Just dived into this software and I’m already excited by what it can do! I didn’t get a chance to play around much with CAD when I was getting my BA. I’ve always wanted to learn, and finally have a chance after all - thanks, PCC!

Fusion 360 has a pretty nifty ray-tracing render mode. It pushes the CPU/GPU pretty hard, but looks glorious

Fusion 360 has a pretty nifty ray-tracing render mode. It pushes the CPU/GPU pretty hard, but looks glorious

It will probably take some time before I take on any meaningful projects, but so far I’m enjoying myself! :-D