Blender: Time To Make The Donuts

I’m very happy with the results of my first project in Blender.

White Frosting

White Frosting

Classic Pink

Classic Pink

And Nekkid!

And Nekkid!

After struggling with Cinema 4D, I decided to use a plugin rather than trying to cludge together some handcrafted fluid simulation. Unfortunately, I ran into a licensing problem with Next Limit’s RealFlow plugin. I’ve been emailing back and forth all week, and they finally got a fix for me — SUCCESS! While I waited to sort that out, I decided to give Blender a try. I began following this tutorial, but quickly found myself getting lost. I needed to become more familiar with the software and interface. I decided to follow a beginner’s tutorial to get my feet wet. I choose this particular video series because it employs procedurally generated elements, and covers all the basic modeling commands, node handling, and the complete stack of scene construction. And also: donuts are delicious. The world is terrifying, and we could all use something sweet.

I am honestly shocked that Blender is a free program. Many 3D programs are horrifically expensive; without student licensing, I could never afford to touch most of the 3D tools I’ve been learning over the years. Yet Blender seems to be very capable as a 3D program. I have only scratched the surface, but it is very impressive. Now that I have familiarized myself with Blender, and have a working fluid simulator plugin for C4D, I am in good shape to begin A/B testing.

Gummi Bears

I’m spread pretty thin between projects, but wanted to post some new renderings. One of the benefits of Fusion 360 is the materials customization built into their rendering pipeline. And I think this project does a good job of highlighting this feature.

I’m kicking myself for not rendering at a higher resolution, but this lighting test did a fantastic job of demonstrating refraction with a slightly rough surface.

I’m kicking myself for not rendering at a higher resolution, but this lighting test did a fantastic job of demonstrating refraction with a slightly rough surface.

While the angle and lighting are more traditional (i.e., less creative) for a rendering shot, I’m including it because of the shadows and light transmittance between materials. This is the kind of thing that only looks convincing with ray tracing. R…

While the angle and lighting are more traditional (i.e., less creative) for a rendering shot, I’m including it because of the shadows and light transmittance between materials. This is the kind of thing that only looks convincing with ray tracing. Raster engines cannot accurately simulate light passing and reflecting off of materials like this.

I have a render running in the cloud right now for a scene with roughly 250 of these gummies piled on top of one another. With so many surfaces and ray transformations and generations coming from such a complex model, I cannot render it to useable resolutions locally. You can see the rest of my renderings and download the models for yourself on GrabCad.

Mac Mini 2018 in Fusion 360

This month cruised by fast. I have been spending the bulk of my time in Fusion 360, both for class projects, as well as personal exploration of the software. Here are some recent renderings:

Apple updated the Mac Mini last month, adding an optional 6-core Intel Coffee Lake (Core i7 8700B) processor configuration, Thunderbolt 3 (USB Type C interface), and a “Space Gray” makeover. using photos from Apple’s product page, I reconstructed th…

Apple updated the Mac Mini last month, adding an optional 6-core Intel Coffee Lake (Core i7 8700B) processor configuration, Thunderbolt 3 (USB Type C interface), and a “Space Gray” makeover. using photos from Apple’s product page, I reconstructed the IO layout and customized material and appearance settings. You can download my model here.

Opposite angle, to show off that sweet white LED!

Opposite angle, to show off that sweet white LED!

For anyone getting into CAD, I also recommend GrabCAD.com, where you can download (and contribute) 3D models for free! I was able to accelerate my workflow by downloading prebuilt models of the ethernet, USB, and HDMI ports.

A Robot Took Your Job

Last week I returned from my trip to Memphis (thanks, Andy! Hope Meara’s potty training is going well!) and I’ve been playing catchup ever since. I’m getting back into Fusion 360 with some more challenging projects. This week we covered how to use joints in assemblies. This is pretty wild stuff. You can download models from GrabCAD.com and upload them Fusion 360. It auto-magically converts models to work natively (with mixed results) in the work space. From there, you can define joints and move parts in real time! We did this in class using an industrial robot model. Of course, this meant the robots needed to fight…

Four robots go in, four robots come out. Because they are metal, and very strong, and even knives won’t kill them!!

Four robots go in, four robots come out. Because they are metal, and very strong, and even knives won’t kill them!!

This wasn’t the actual assignment. Instead we needed to create a render scene involving an earlier model from this class being assembled by robots. I was grinding away at this all day yesterday, and finally got around to rendering it. Because of the complexity of the scene, it’s taking quite some time to bake in all of those rays at HD+ resolution. Here’s the object being assembled for reference:

This is based on an existing design from a vinyl shelf I bought to keep my Laserdisc collection in prime display condition. I fantasized about having an actual product made for Laserdisc, and what that might look like. You gotta with red trim right?…

This is based on an existing design from a vinyl shelf I bought to keep my Laserdisc collection in prime display condition. I fantasized about having an actual product made for Laserdisc, and what that might look like. You gotta with red trim right? Because LASERS!!

Here’s a technical drawing, if you want to build your own. This will probably hold about 250 titles, based on my experience with my current shelf ( tweaked the dimensions to give it a bit more depth and room to breathe between stacks.

Here’s a technical drawing, if you want to build your own. This will probably hold about 250 titles, based on my experience with my current shelf ( tweaked the dimensions to give it a bit more depth and room to breathe between stacks.

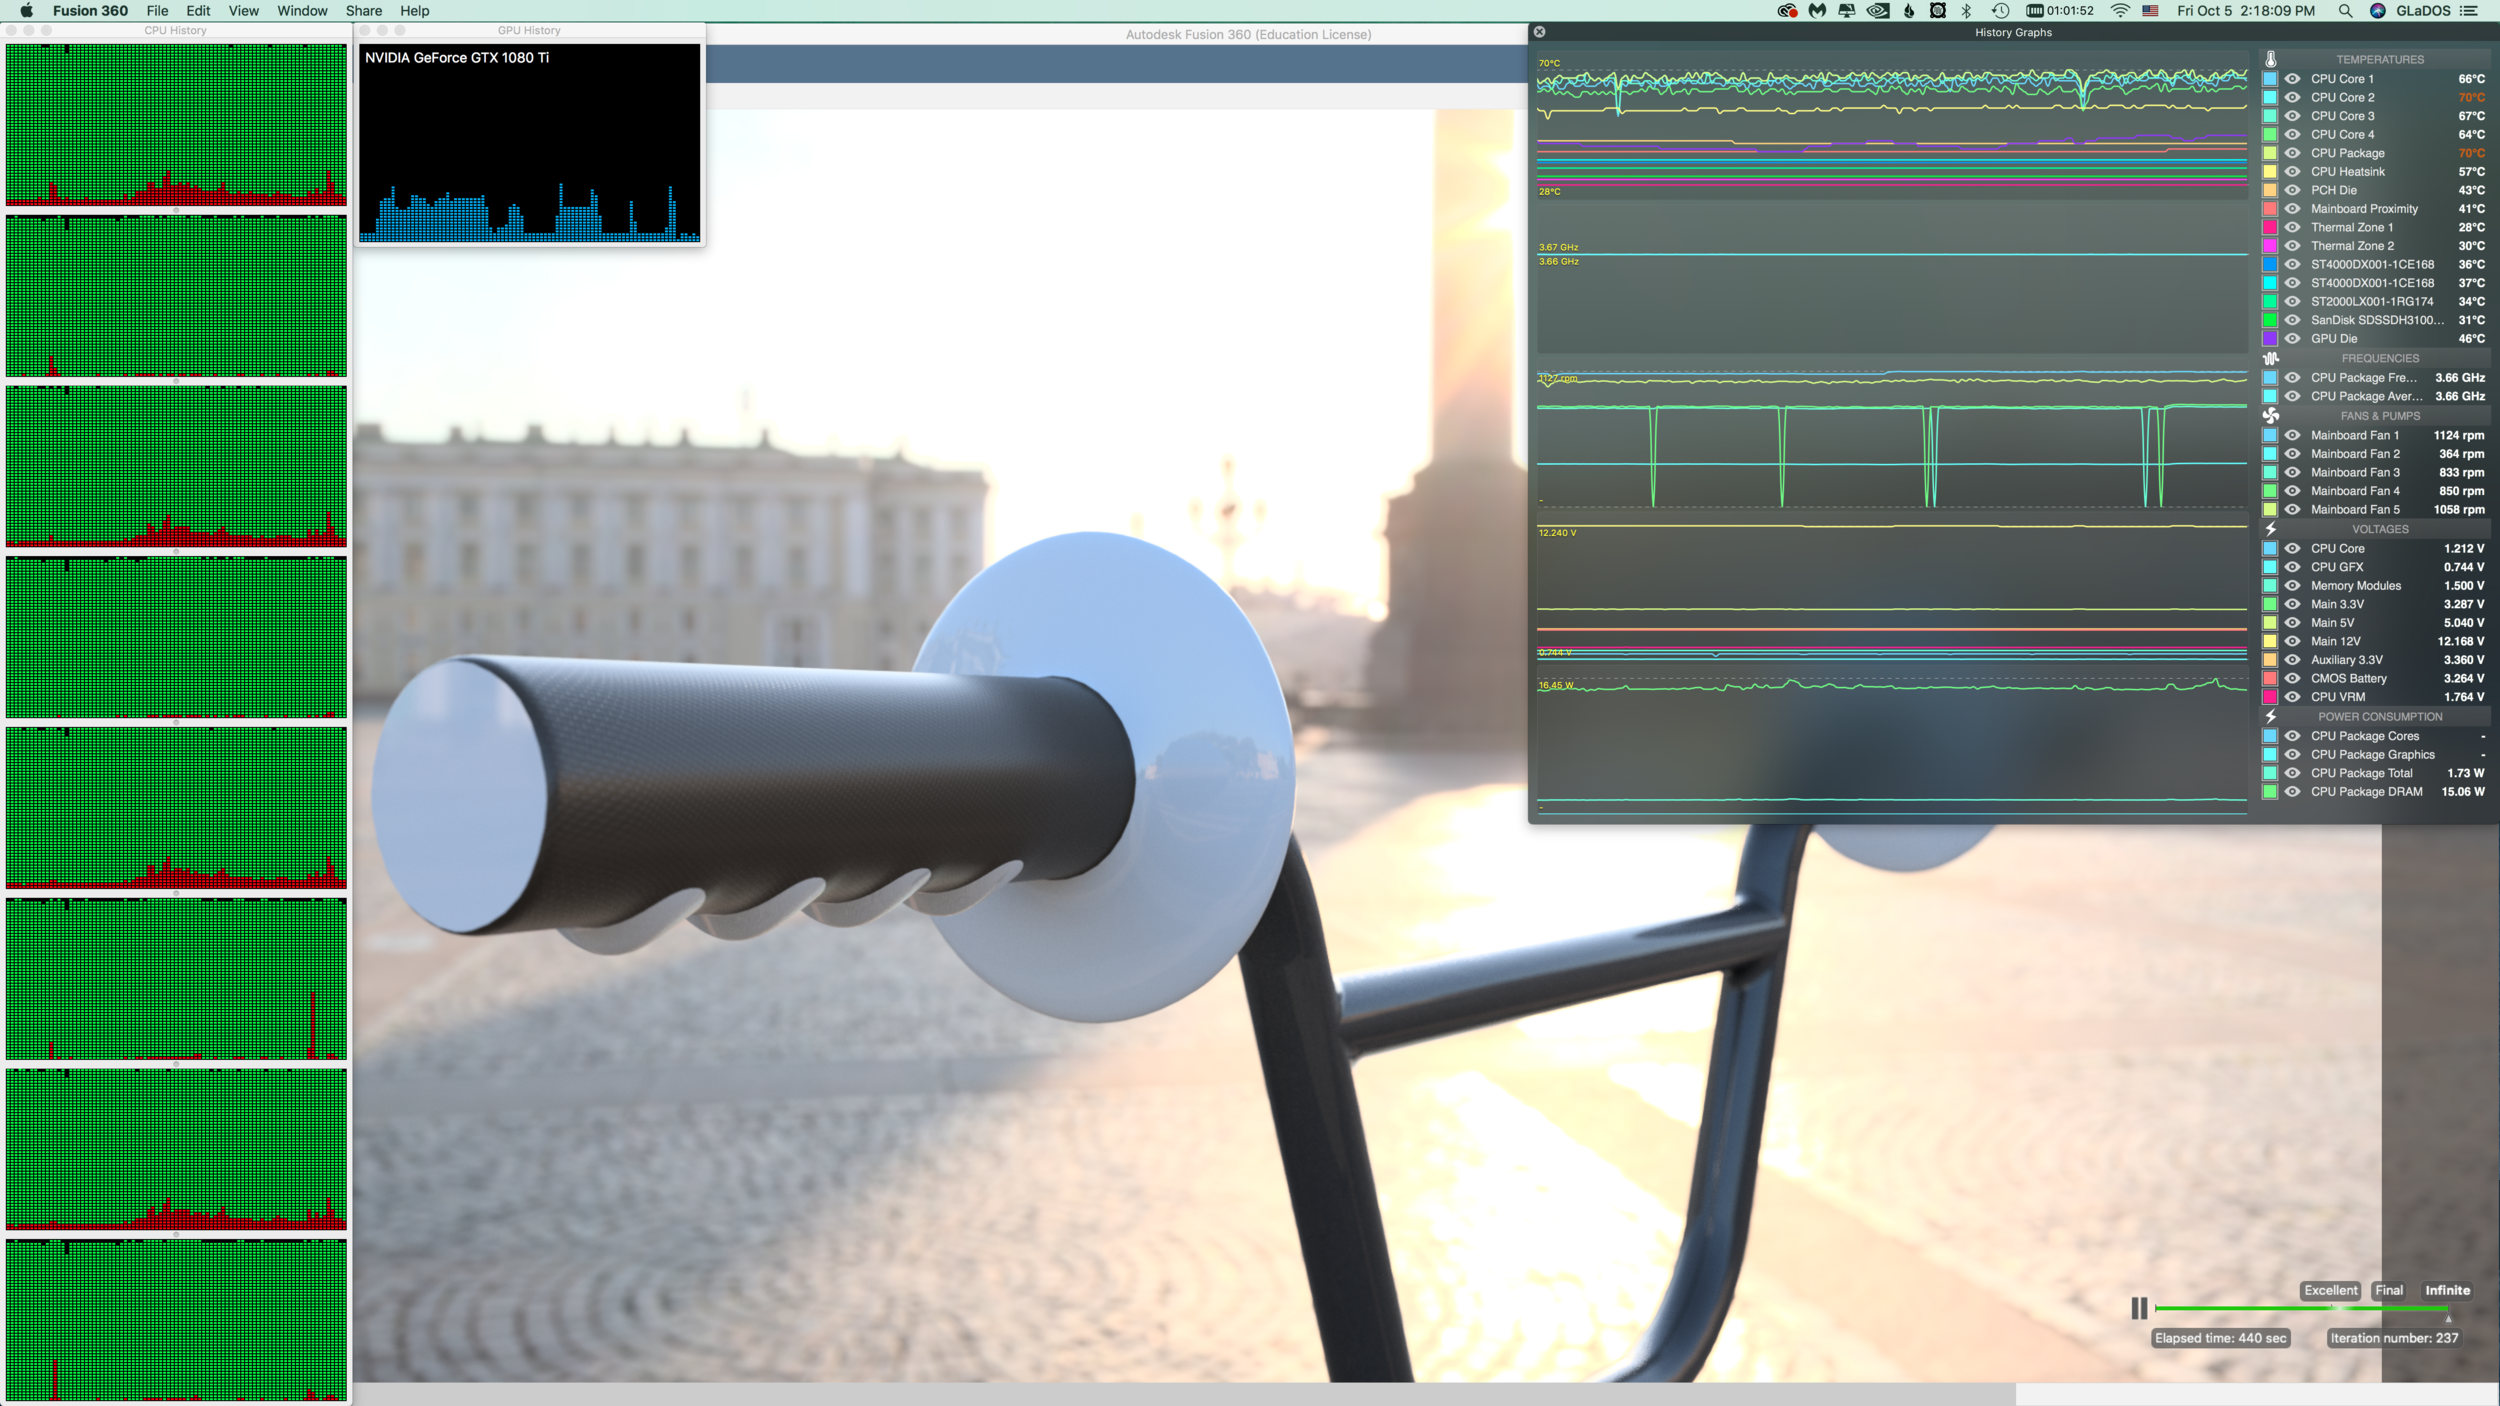
i’ve been taking this class as an opportunity to not only learn the software, but also to push the limits of what the software can do. For me, this practice is like cartography. I’m mapping the borders by extending to the edge in all things. With this project, I wanted to not only torture test the rendering pipeline, but also test the limits of my beefy Hackintosh. As noted previously, my CPU appears to be the main bottleneck. But I wanted to see what it takes to exceed memory requirements. For this design and ray tracing session I’m utilizing ~25 GB of memory, and cooking my poor little quad-core Haswell® chip.

Nothing cooks like CAD! Note that the temperatures reflect a system with AIO liquid cooled CPU, and nine total fans, packed into an old PowerMac G4 case. Even when protein folding on both GPU and CPU, the system usually has a CPU core temperature ce…

Nothing cooks like CAD! Note that the temperatures reflect a system with AIO liquid cooled CPU, and nine total fans, packed into an old PowerMac G4 case. Even when protein folding on both GPU and CPU, the system usually has a CPU core temperature ceiling of about 70˚ C.

It’s been over four hours as of writing this, and the rendering has not yet reached “final” quality. Scene complexity is a huge factor in rendering time.

Autodesk Fusion 360

Just dived into this software and I’m already excited by what it can do! I didn’t get a chance to play around much with CAD when I was getting my BA. I’ve always wanted to learn, and finally have a chance after all - thanks, PCC!

Fusion 360 has a pretty nifty ray-tracing render mode. It pushes the CPU/GPU pretty hard, but looks glorious

Fusion 360 has a pretty nifty ray-tracing render mode. It pushes the CPU/GPU pretty hard, but looks glorious

It will probably take some time before I take on any meaningful projects, but so far I’m enjoying myself! :-D