Picatinny Rail set with US quarter dollar coin for scale, Quixel PBR materials rendered with Fusion 360
Want to bring your Fusion 360 designs to life? Then let’s take a look at a wonderful alternative to Autodesk’s built-in materials library. First, what does Fusion 360’s material library look like?
ANATOMY OF FUSION 360 PBR MATERIALS
Before we can explore alternatives to Fusion 360’s included materials, we need to understand what elements these materials are made from. PBR (Physically Based Rendering) materials are built from multiple images:
Albedo/Diffusion/Color — the color a material reflects
Normal and/or Height Maps — the bumps and imperfections along a surface
Roughness — the smoothness of a surface (ranging from a sharp reflection to fuzzy/diffuse)
Reflectance/Specular/Metalness — the reflectiveness of a surface (ranging from mirror finish to a dull surface)
Anisotropy/Ambient Occlusion — the shadows along a surface
Refractive —how light bends through a surface
Emissive — how much light a surface emits (glow)
Translucency/Opacity — how transparent a surface is to light
We can access these different elements through the Appearance window in Fusion:
Preview image for Part 2 of this tutorial, where we’ll go over importing materials to Fusion 360.
Fusion allows you to modify existing materials through two primary mechanisms: Sliders and Images.
Elements of material can be controlled with Slider values or Images (i.e., material maps)
Sliders apply a value to the entire surface, whereas images allow for a per-pixel value (maps). Quixel Mixer generates images for their materials, and this is what allows us to apply a Quixel material to a Fusion 360 model.
INSTALLING QUIXEL MIXER
Quixel Mixer is a free to use materials tool for use with Epic Games’ Unreal Engine. Technically, their EULA limits using their materials for Unreal Engine only. However, there’s no reason why you could not import models from Fusion to Unreal (as an Autodesk .FBX file export), so it’s valid (in my opinion, and I’m not a lawyer) to preview materials in Fusion’s rendering engine prior to exporting to Unreal. Let’s install Quixel Mixer!
Go to quixel.com
Next, scroll down to “Download.”
After the download finishes, open the installer.
Click next, and you’ll see an option to install various material packs. Just like with Fusion 360’s material library, you can always install additional materials as needed. Click next to continue with the basic “Sample Mixes” pack.
Leave the default directory names suggested and click next until you reach the download screen. Depending on your internet connection and disk read/write speed, this will take quite some time. Get yourself a coffee or a beer, maybe take a walk if you’ve opted to download the rest of the material packs.
After the download finishes, Launch Quixel Mixer!
You’ll be presented with some sample mixes, feel free to explore these, and when you’re ready to proceed, let’s make your first mix.
2. CREATING A NEW QUIXEL MIX
Create a new project.
Create a new mix.
Click “All Types” and then select “Surface” from the drop-down menu.
For this tutorial, I’m downloading the “Damaged Asphalt” material. Feel free to select something else if that material doesn’t inspire you.
After downloading the material, you’ll see a green checkmark next to it.
Click and drag the material to add it to your mix.
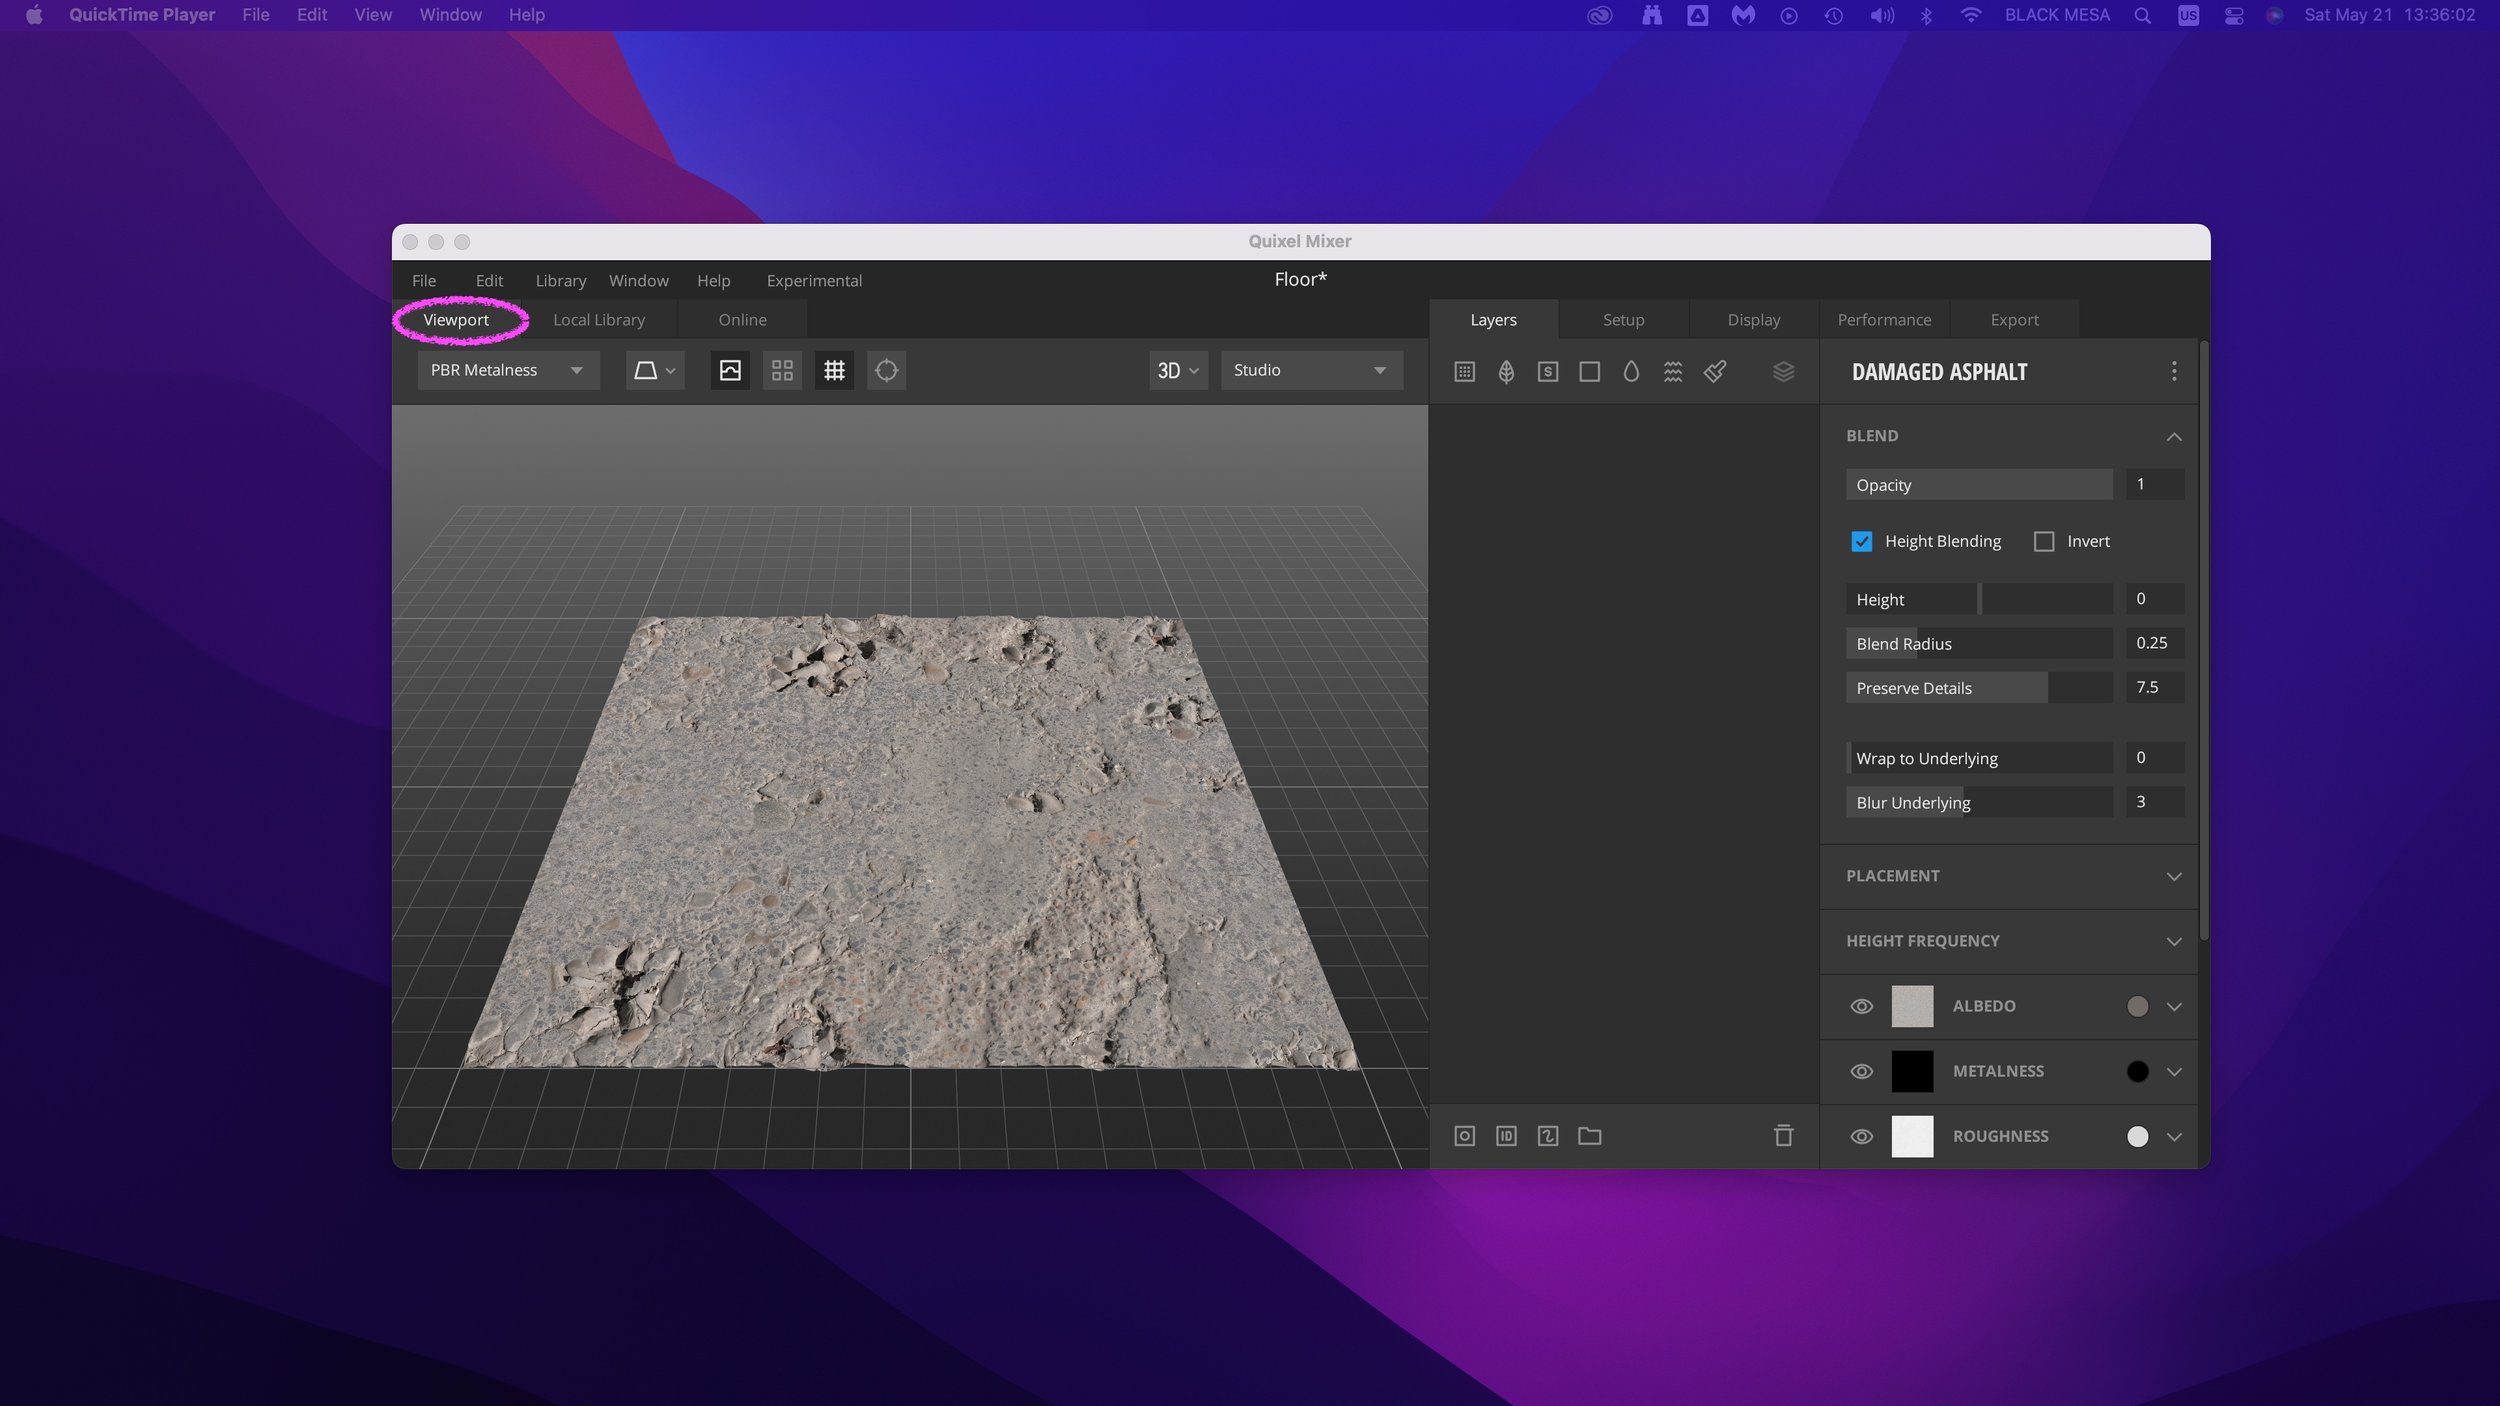
In the viewport, you can view this material as a preview.
There is a reason why this tool is called Quixel Mixer — it allows you to quickly and easily mix several PBRs into a new material. Let’s add another asphalt layer to this mix.
Once again, select a new material (e.g, “Cracked Asphalt”) and download it.
After the download finishes, and you see the confirmed green checkmark, simply drag the new material into your Layers column.
This will add the new material to the existing mix.
Try playing with the sliders on the right. You’ll see the changes to the material mix in realtime in the Viewport.
Once you’ve created your desired appearance, you’re ready to export it.
3. EXPORTING QUIXEL MIXER MATERIAL MAPS
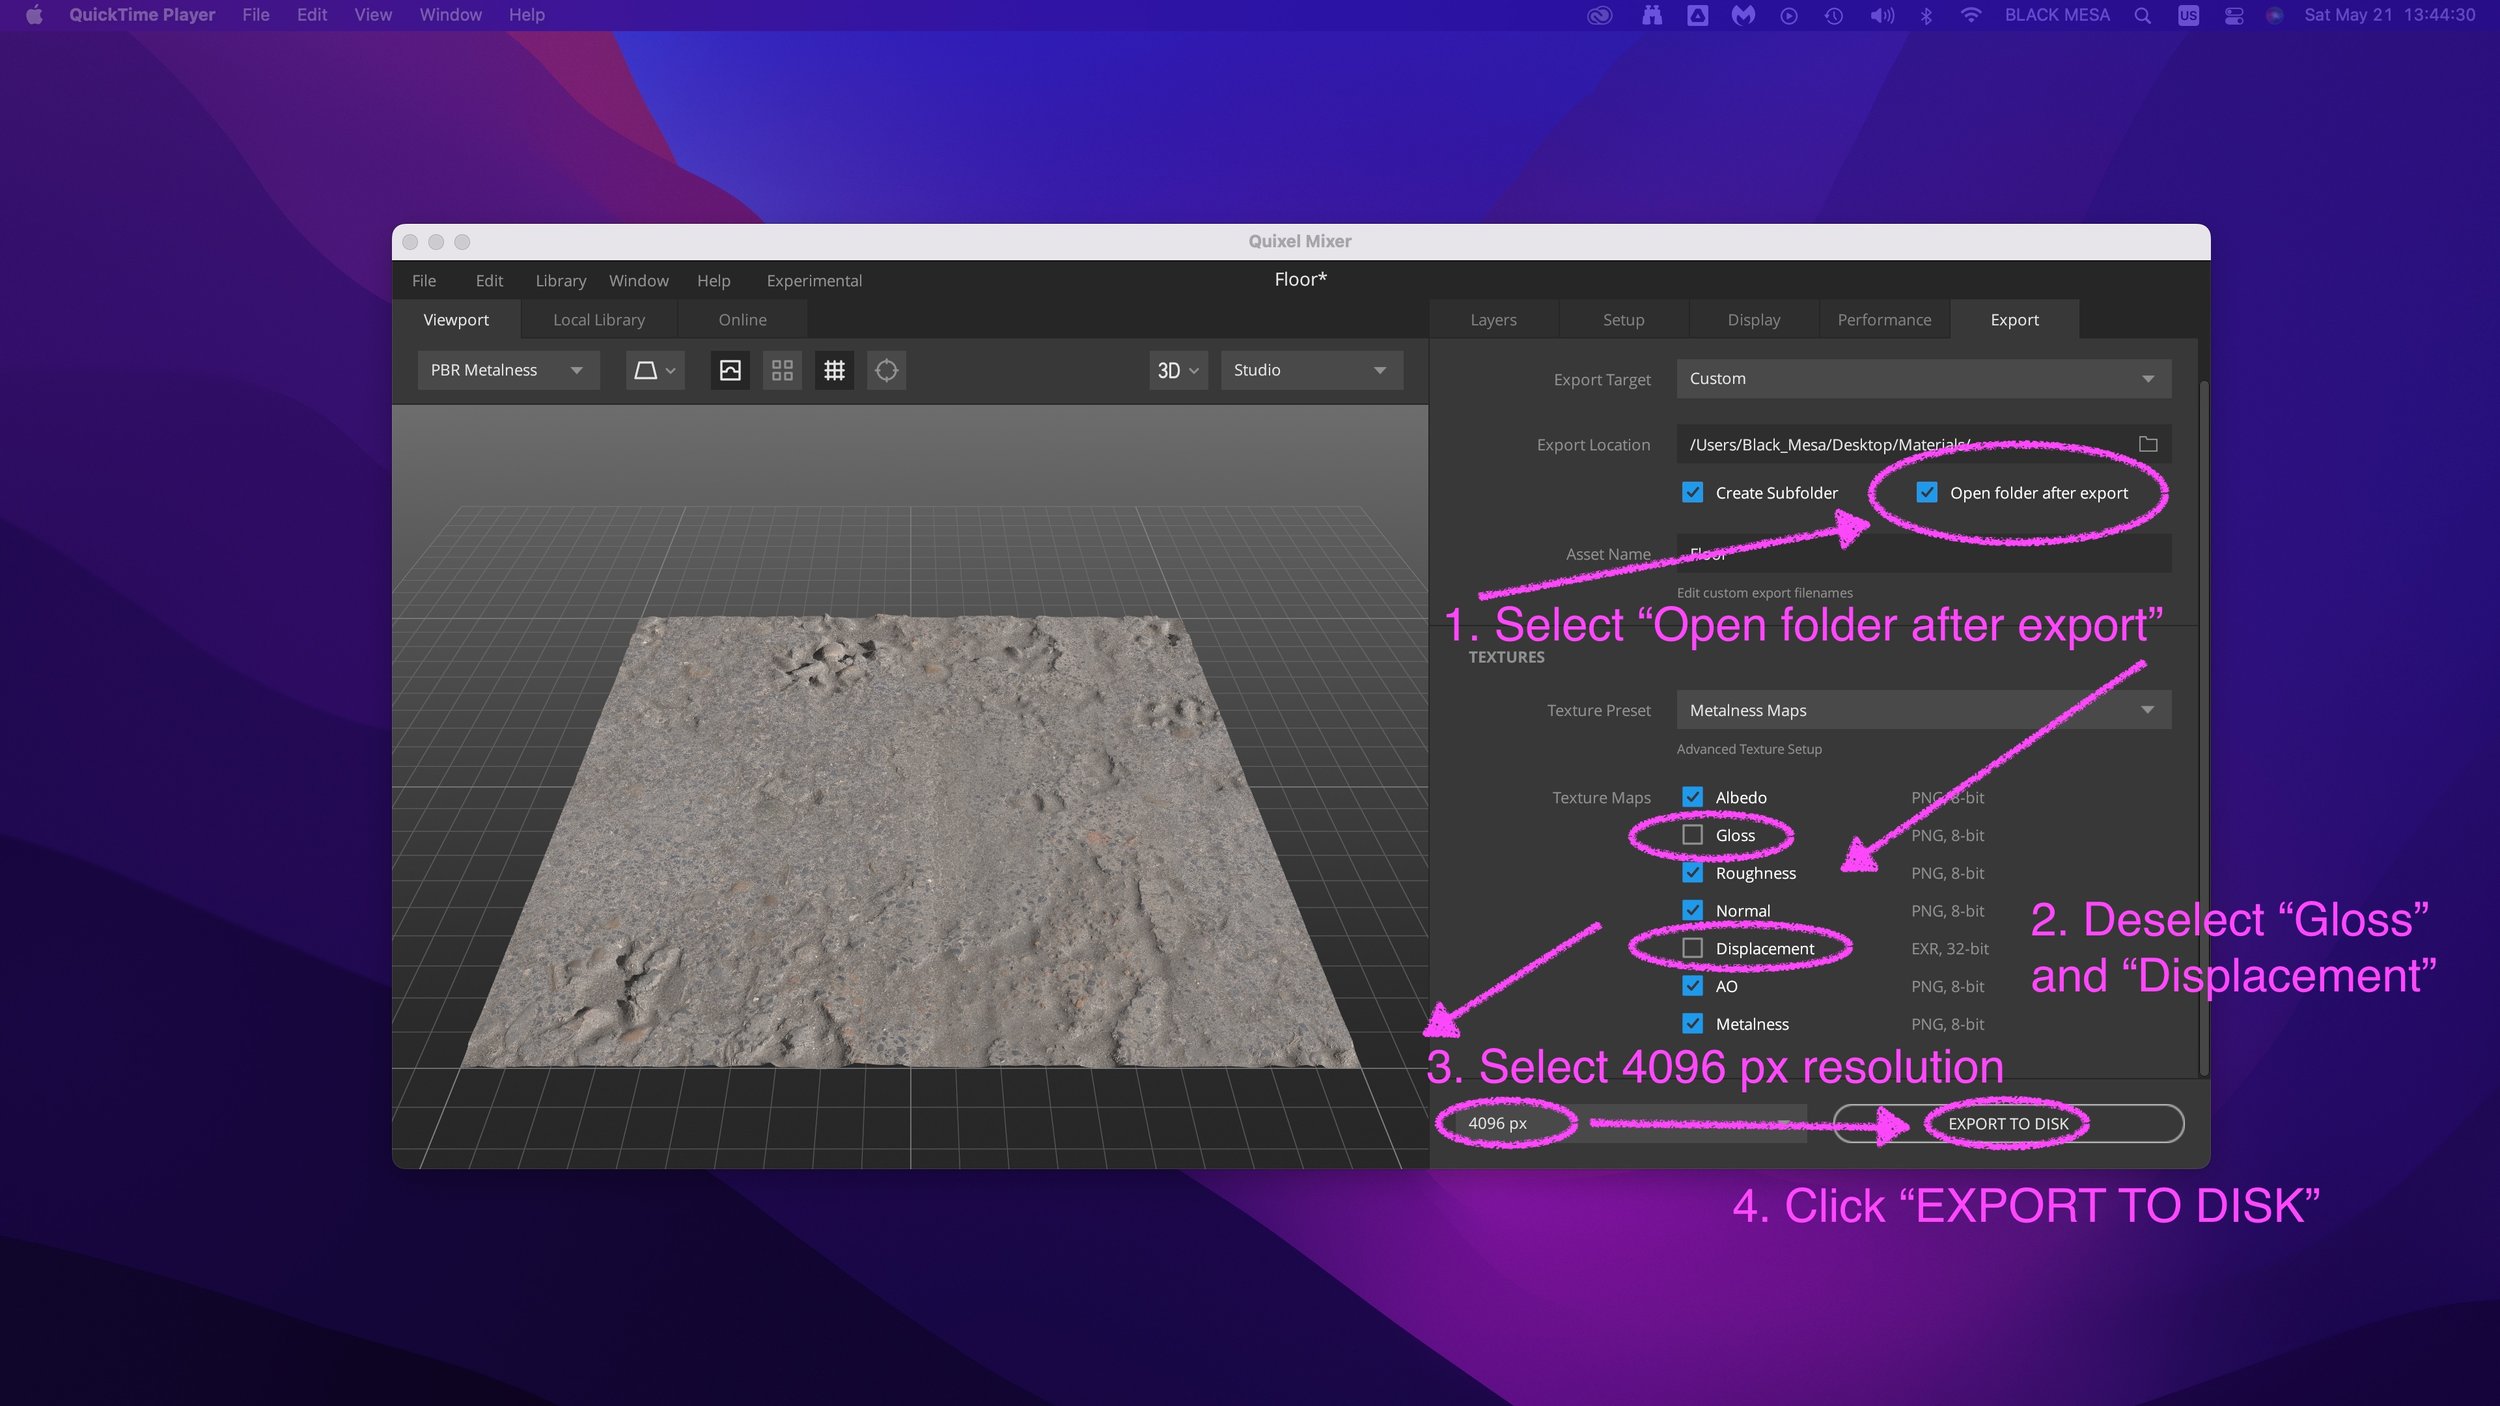
Select “Open folder after export” and then deselect “Gloss” and “Displacement” (we won’t be using these elements with Fusion 360), then select 4096 px from the dropdown menu (to export a 4k resolution mix), and finally — EXPORT TO DISK.
After the export finishes, you’ll see a window (Finder on macOS, Explorer on Windows) with your material maps. Notice that the file sizes are huge. That’s because these are high quality PNG files with an alpha layer. We’ll need to optimize these before bringing them into Fusion 360.
4. OPTIMIZING MATERIAL MAPS FOR USE IN FUSION 360
(optional, but recommended)
We can do this with Photoshop. Make a new folder for your optimized material files.
Open the material map images and create a new Action (open the “Actions” window and click the “+” sign) and name it something like “Fusion Material Export” and then click “Record” to begin capturing your actions.
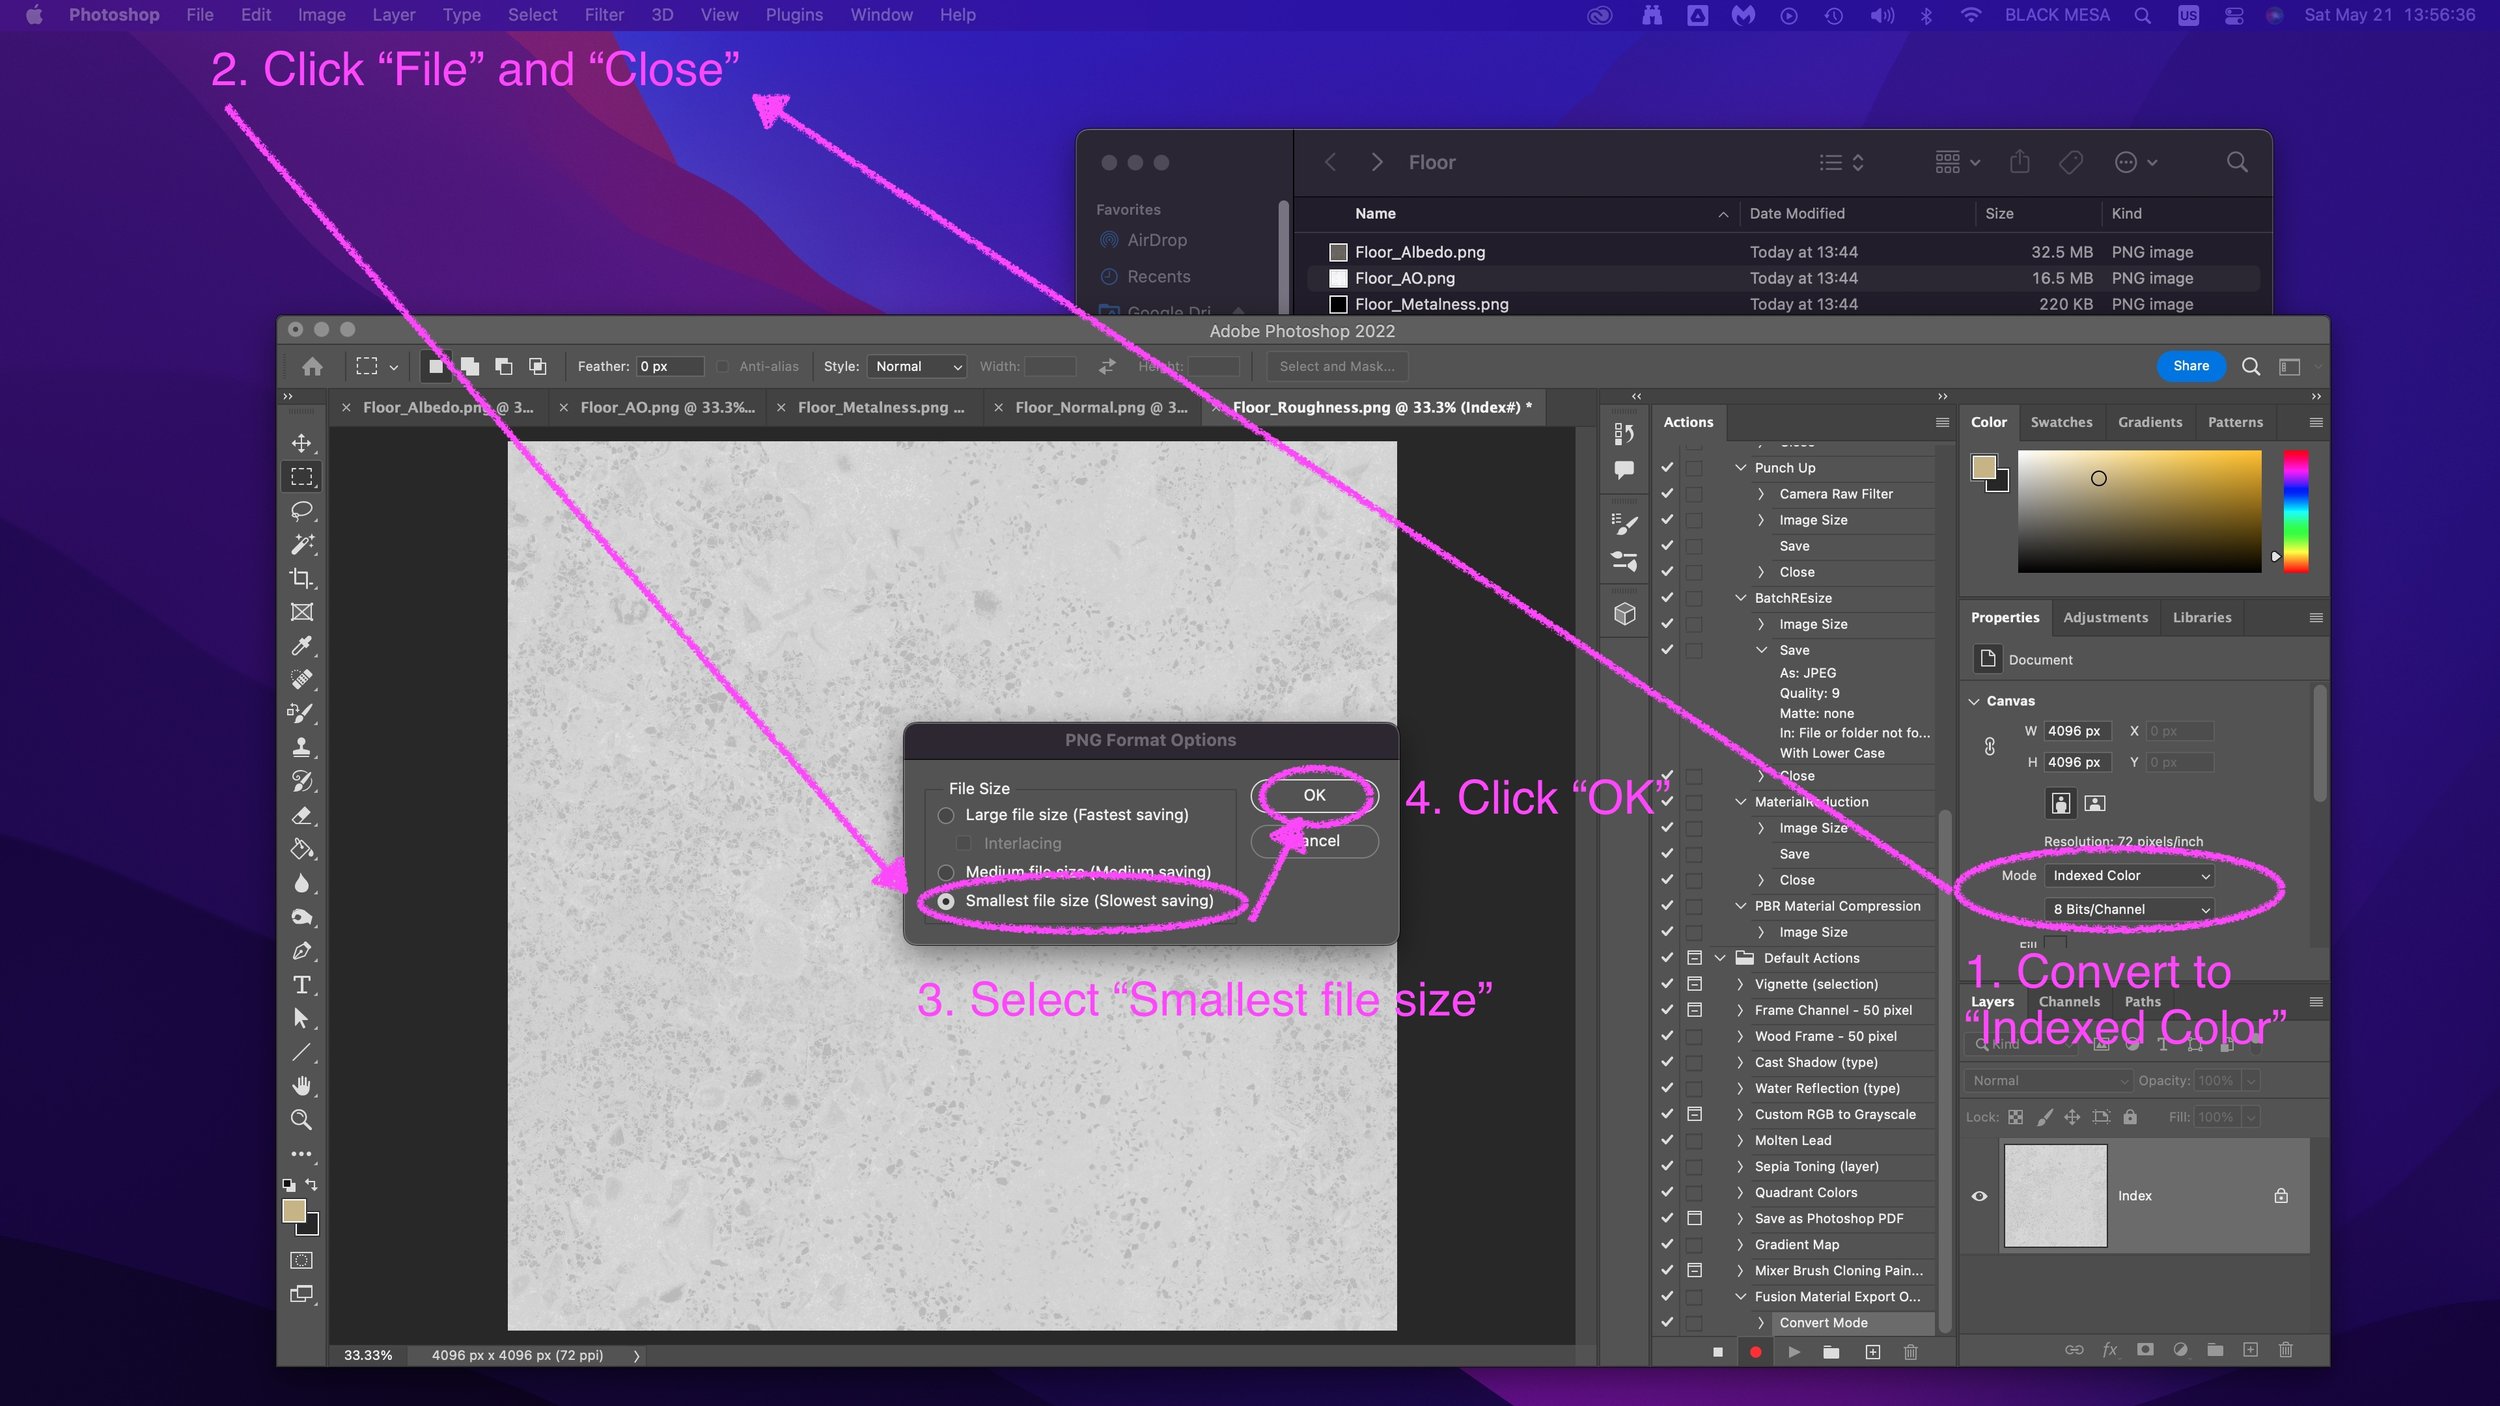
From the “Image” menu, click “Mode” and select “Indexed Color.” Set the color convert to “Local Perceptual” and set the color limit to 64. Click OK, and then go to “File” and “Close.” Select “Smallest File Size” and Click OK.
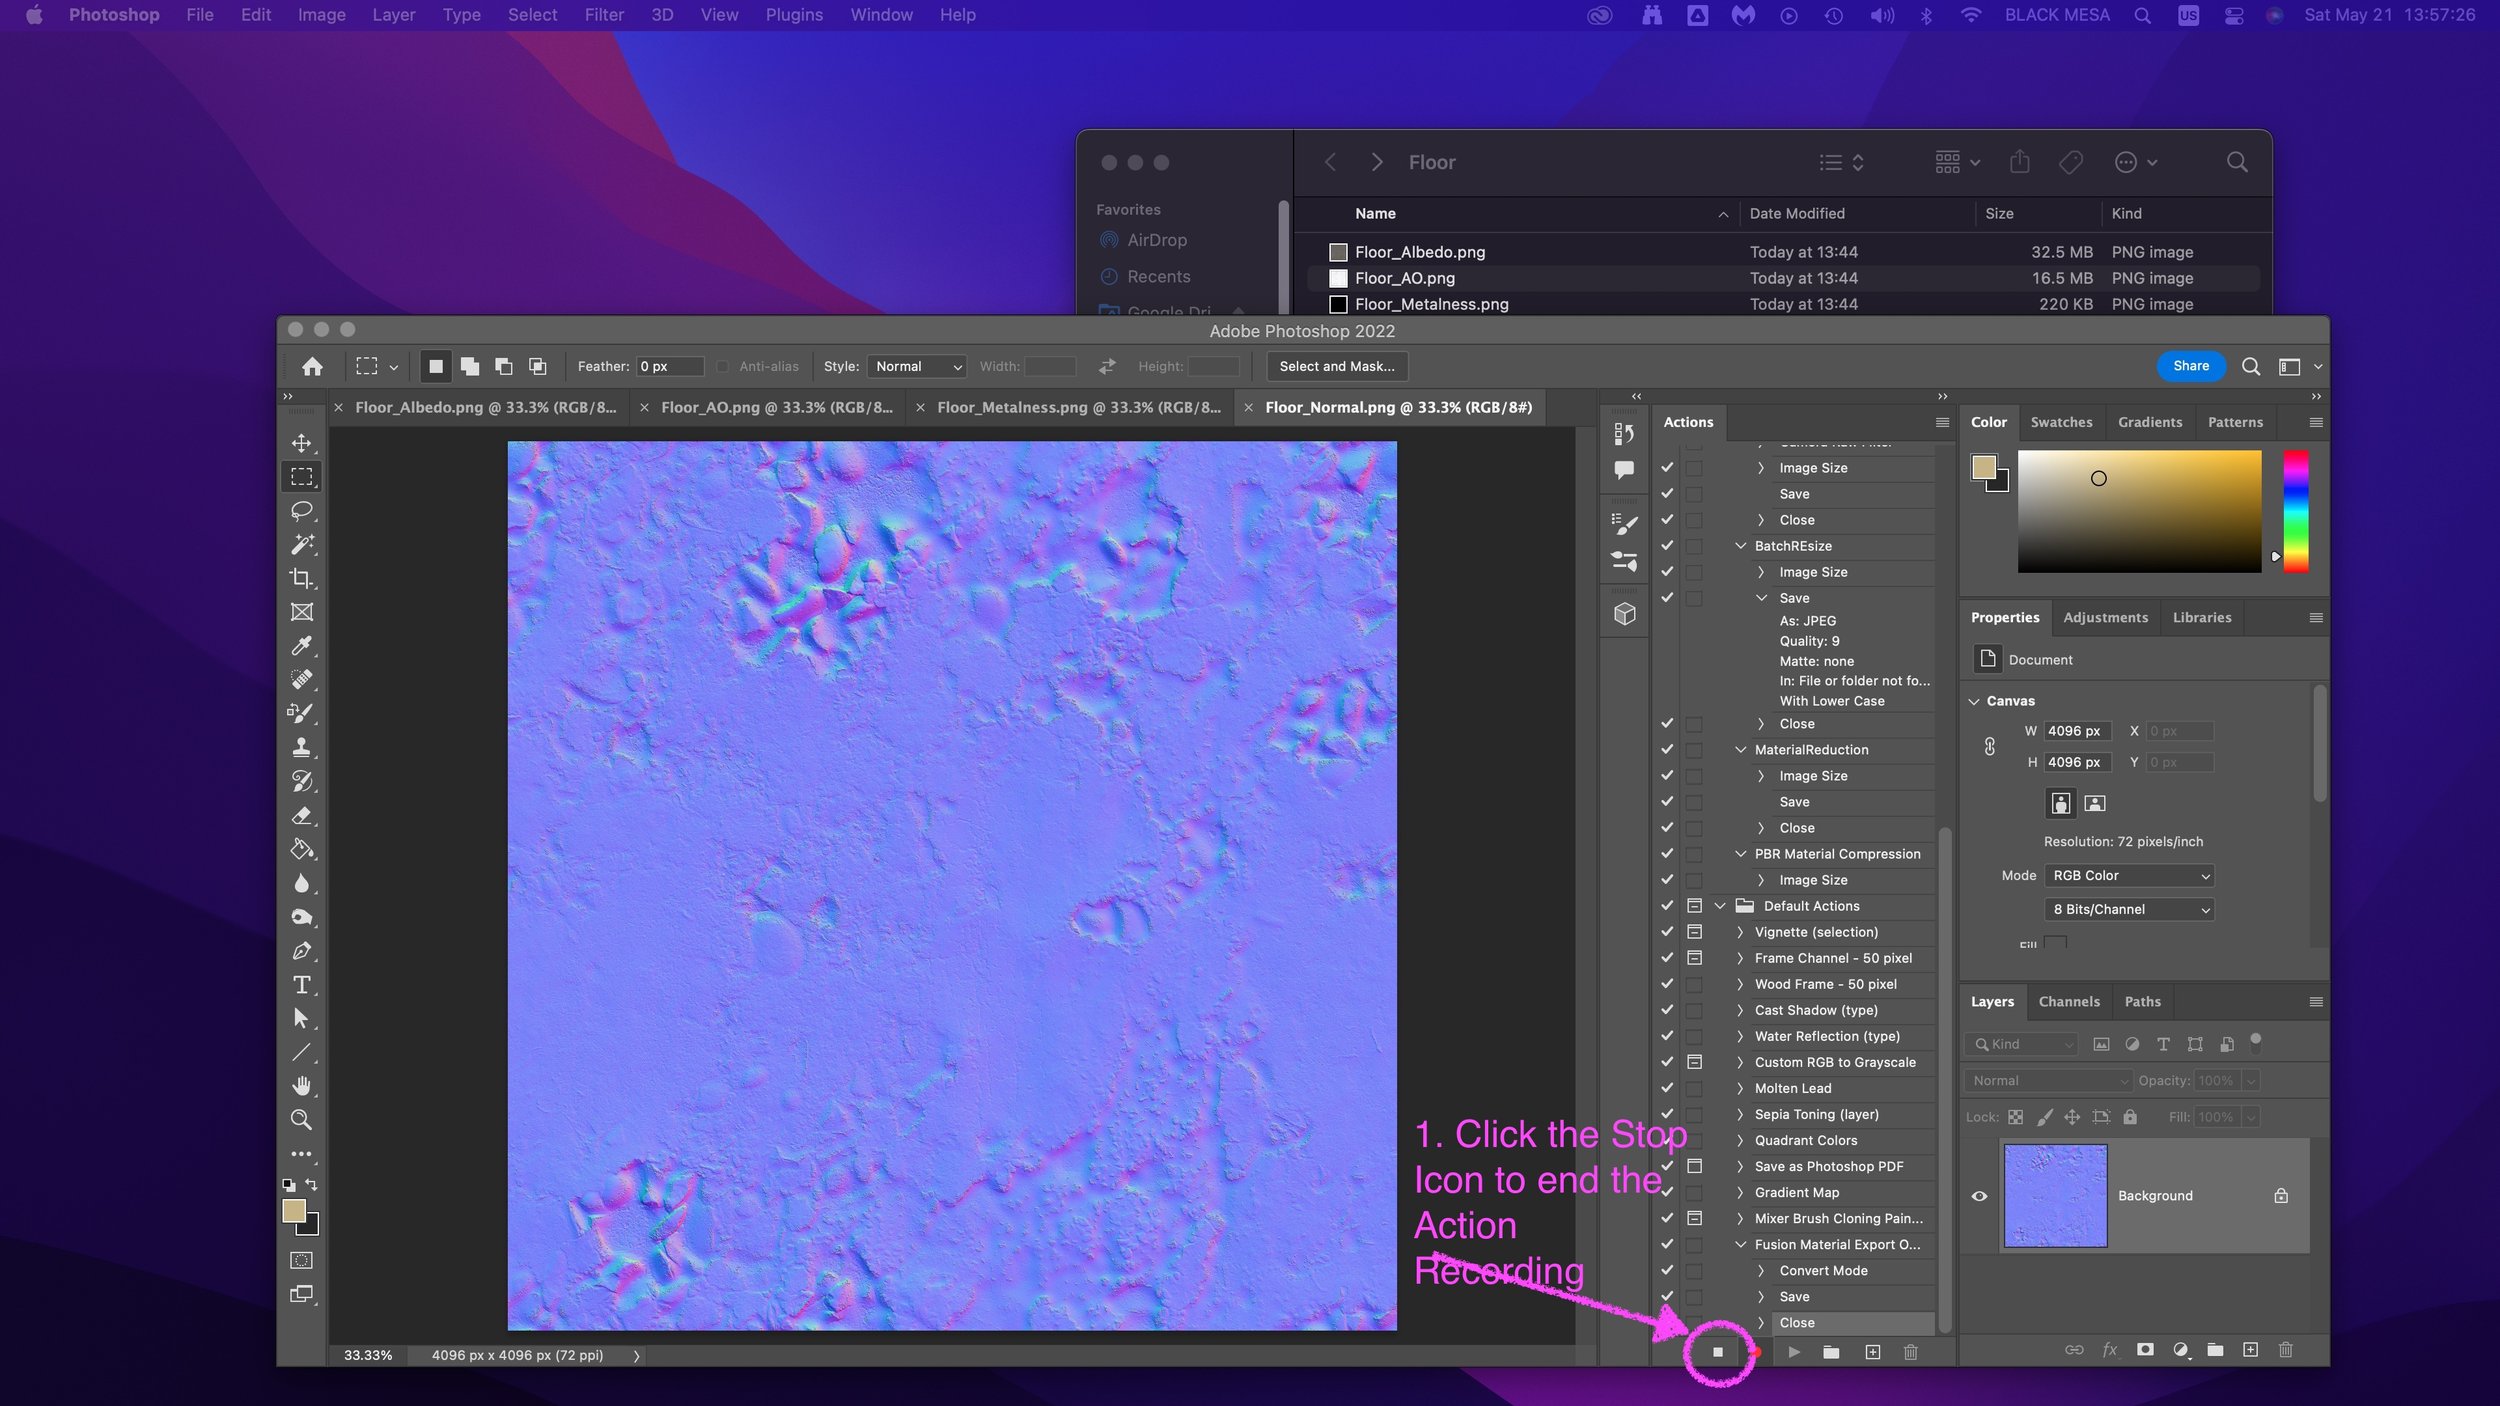
Stop the Recording by clicking the Stop icon (a gray square).
For the next image, we can now repeat the action by clicking play.
As you can see, we shrunk the file over 3x smaller and with virtually no loss to quality. Not bad!
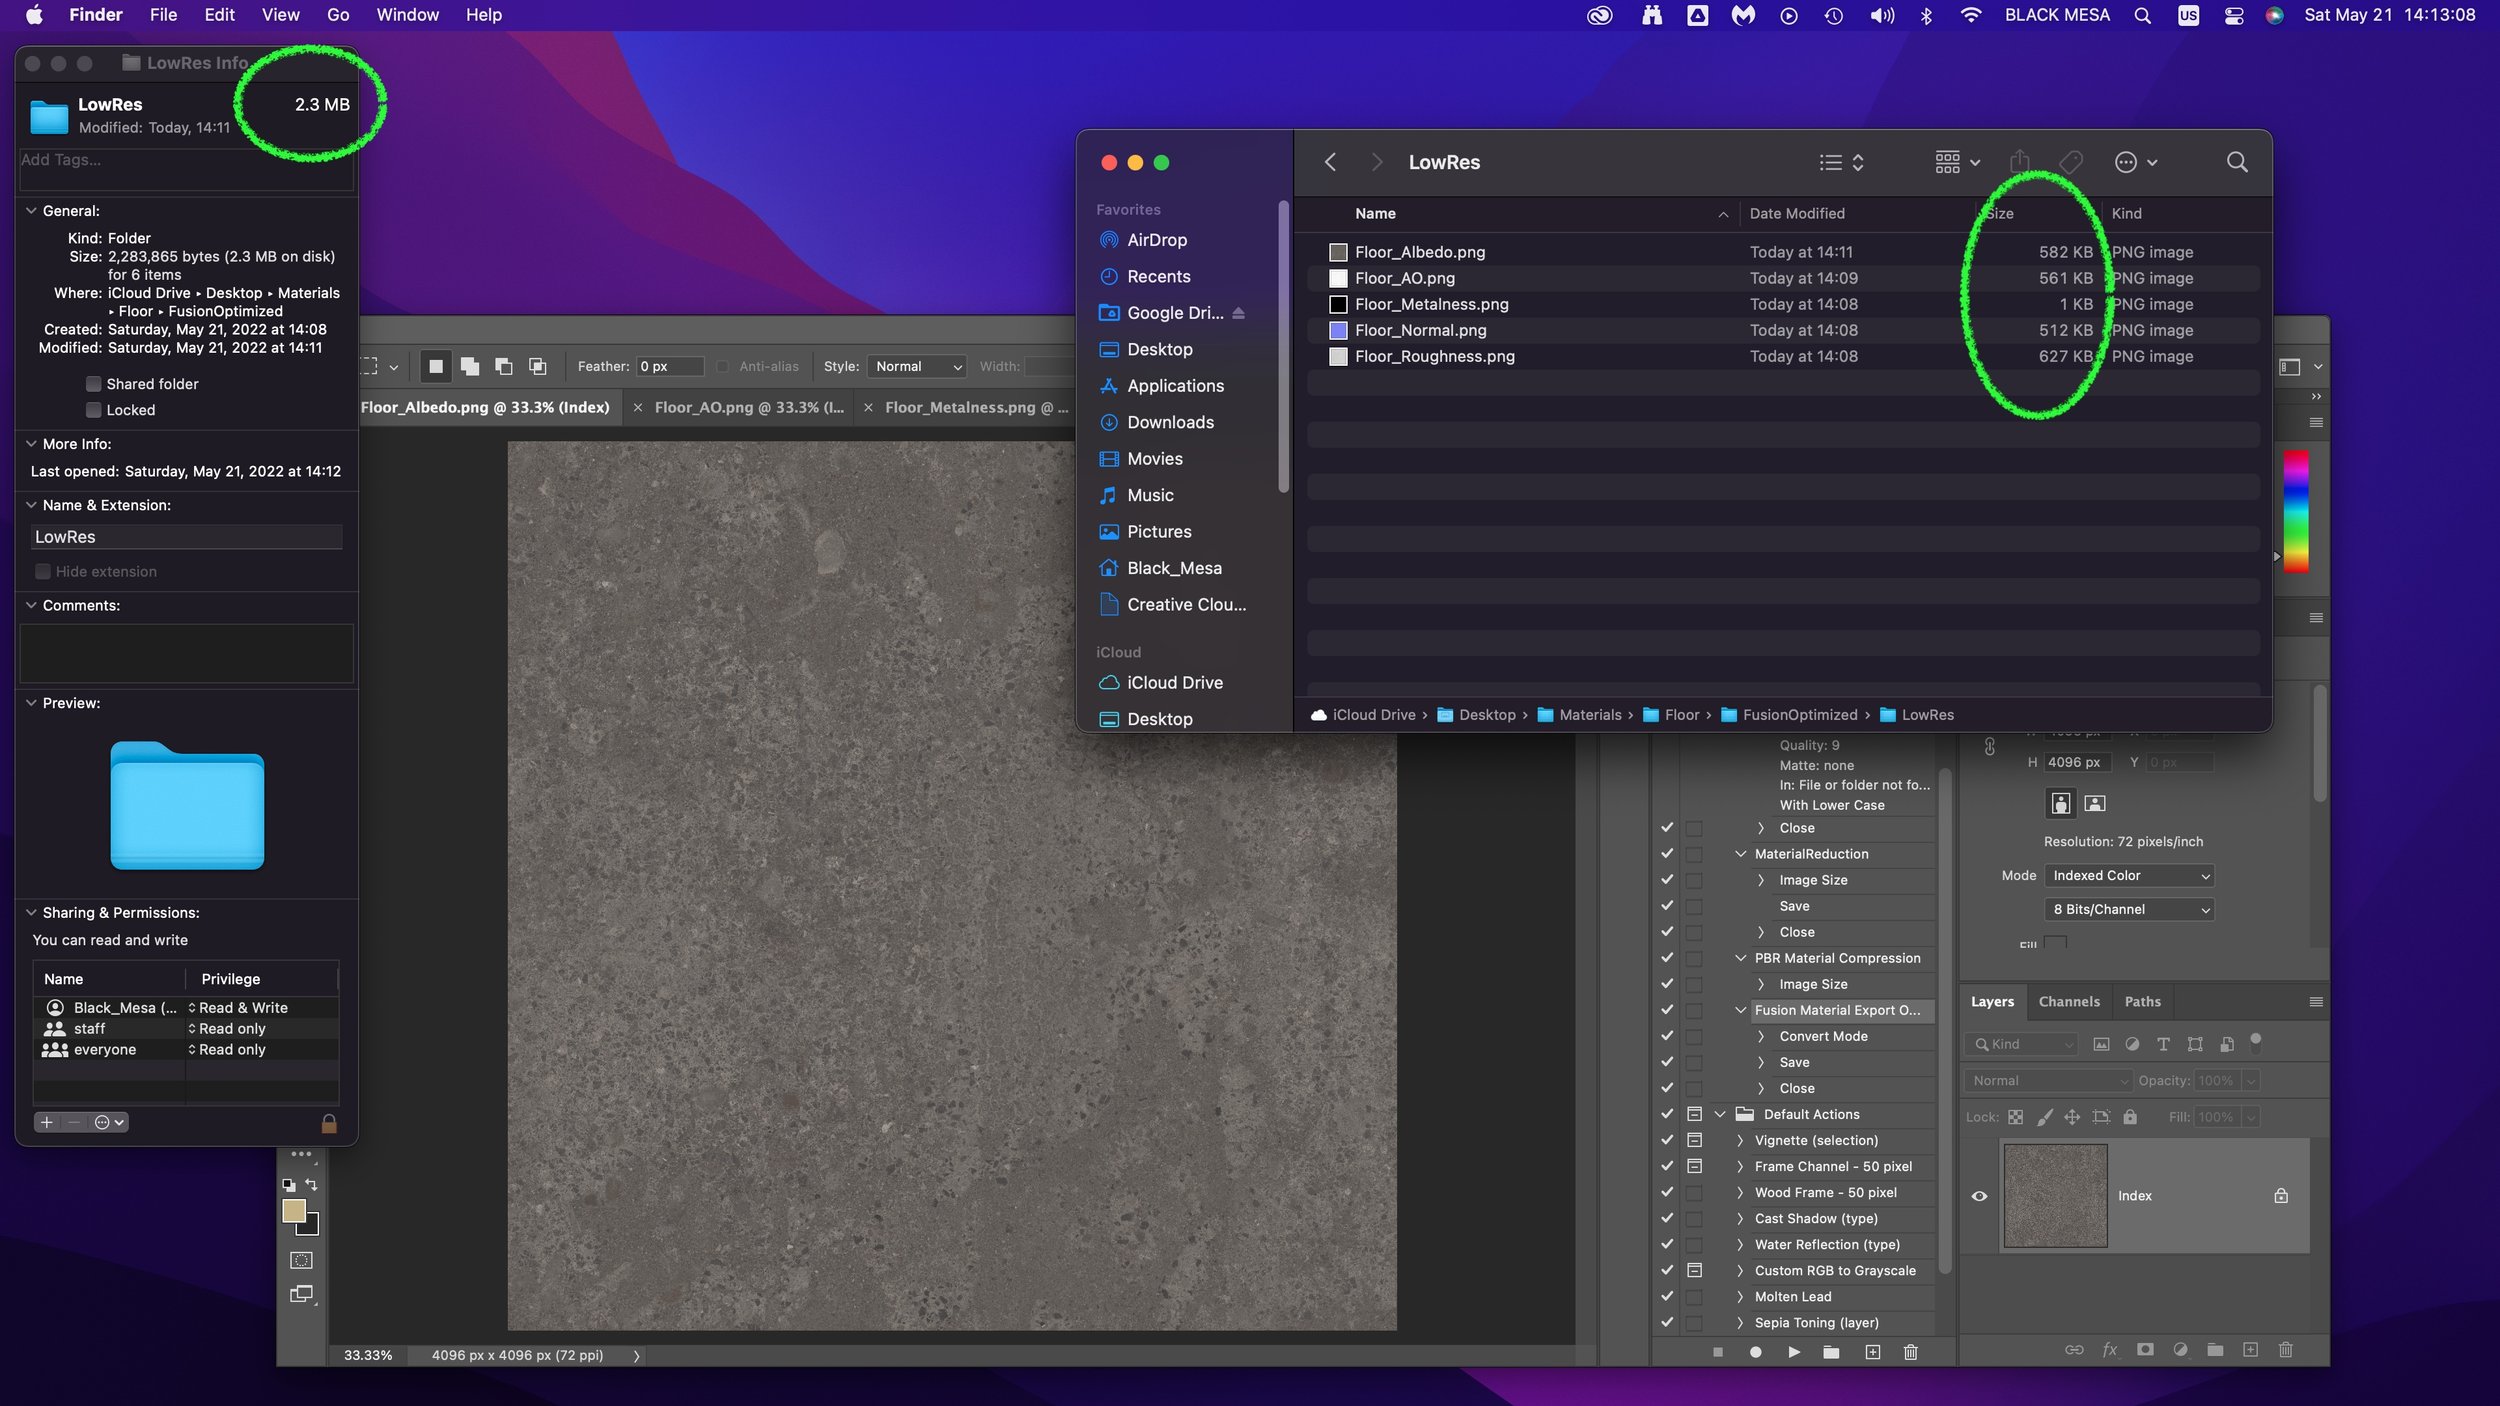
If you want to shrink further, we can also easily export lower resolution images. In this example, I selected 1024x1024 (1K resolution), and reduce the color count to 8-bit (256 color limit). This is a good option, especially if you want to create Augmented Reality versions of your design.
As you can see, the low resolution exports shrink down to less than 3MB. You’ll lose some image quality, but the file size is reduced by over 97%.
In Part 2 of this tutorial, we’ll go over how to bring these materials into Fusion 360.


